Sunday, 10 July 2022

AK47 Republic - Objective Markers Part 9: Supply Dump

 For my supply dump objective marker, I had originally planned to cut some wooden dowels to size and cover with a PVA soaked baby wipe as a tarpaulin.  I even got as far as getting the wooden dowel, a tiny bit smaller in diameter than I wanted but it would have looked OK under the tarpaulin.  Unfortunately I ran out of time due to the rest of the family getting ill.

The original plan

I added 4 stacks of 3D printed fuel drums to create the supply dump.

Supply dump.

Some tufts of moss off a brick in the garden were used for larger plants to help hide the bases of the fuel drums.

Trees base detail - cat litter pellet "bark" etc.

Although the end result looks fairly good, I was disappointed.  I had intended this to be more than just a few pre-made objects plonked on a base, some of which look like they're hovering slightly above the ground.

Supply dump.

The original plan would have involved more actual hand-crafting of the supplies and making sure that they had soil and vegetation applied ot blend them into the base.  That said, the ground and the tree were all hand-made, and at the end of the day, it will still come in useful as an objective marker for a game.

Saturday, 9 July 2022

AK47 Republic - Objective Markers Part 8: Land Rovers

I needed some vehicles for my objective markers and Land Rovers were something I'd been planning to 3D print for a while.  I decided on some of M_Bergman's excellent 1:100 models, in this instance the short wheel base Land Rover 90 pickup version (so called because in real life it's 90 inches long).

I painted up a couple for my little dioramas, one in GW base blue, the other Vallejo reflective green.  I have another 2 that are crying out for recoiless rifles or an HMGs on the back as technicals.

The blue Land Rover as featured in my archaeological objective marker is based on the one seen in some episodes of Time Team.  I attempted the Time Team logo on the door and it didn't turn out too bad.  The real one is a standard hardtop rather than a pickup but I wanted this version for my little scene.

The Land Rover 90 comes in a huge range of colour schemes, I adopted the grey front grille and headlight surround, though once I'd given it a shading wash it looks almost black anyway.

There's a nice amount of detail in this model, with the correct light clusters and even a little number plate.  I gave it a pinwash of dilute black ink and a drybrush of dusty brown to finish it off.

The green colour is a fairly standard Land Rover colour that will work for either a civilian vehicle or a military one.  I found that Vallejo Reflective Green seemed just the right colour for this.

I gave it the same dark shading wash to selected areas and a dusty drybrush.  This one got some extra brown drybrushing up the sides and back for a more used look than the blue version.

This one will appear in one of the later objective markers.

Friday, 8 July 2022

Rebel Minis ScorpionMech Kickstarter

 I thought I'd drop in a quick post about the new Rebel Minis Digital Direct Kickstarter for their new ScorpionMech which ends around 20th/21st July (not sure which, depends on which time zone you're in?).  This has been designed by the talented Mr John Bear Ross, many 15mm sci fi gamers may well have some of his models already - he has designed a lot for Rebel Minis and also produced a lot of lovely vehicles for Critical Mass Games, some of which are now available from Ral Partha Europe. Although the main model is 28mm, the stretch goal for 15mm versions has already been reached, and those will be included in the basic pledge which is $30 or about £25.

Picture from Kickstarter.

A lot of the older models are available as add-ons to the Kickstarter.  I purchased the digital files for the Earth Force and Titan Marine VIPER suits a few weeks ago and although they aren't finished yet, I thought I'd share a few photographs I took so you can see the sort of detail and quality you get. These are available as some of the add-ons to the Kickstarter and they're absolutely fantastic.

My first combat VIPER is an all-missile version, either a tank-hunter armed with ATGMs, or a mobile artillery unit.

Missile VIPER.

Missile VIPER.


Missile VIPER.


Missile VIPER.

The second combat VIPER has a more general loadout.  I tried for a pose as if it's tracking a target on the move, with the missile pod, chin gun and right arm all swivelling.  Not sure if it really worked but it's a bit different from any other mecha poses that I have.


Anti-tank VIPER.

Anti-tank VIPER.

Jet pack detail.

I painted the standard cockpit VIPER as a civilian construction or loading mech.  This is actually painted with emulsion house paints!  The Wilkinson's tester pot "Bumblebee" yellow turns out to be better than any acrylic model paint that I've found.

Construction/loading VIPER.

Construction/loading VIPER.

Construction/loading VIPER.

Construction/loading VIPER.

Construction/loading VIPER.

Once I've got the VIPERs finished off, I'll take a few better photographs and go into more detail on their various features and how I painted them.

Wednesday, 6 July 2022

AK47 Republic - Objective Markers Part 7: Archaeological Excavation

With the basic groundwork complete for my archaeological excavation objective marker, I would need to add a number of special features.

The original concept for the objective marker.
 

I recently subscribed to a Patreon for Random Miniatures who produces a range of great 28mm figures including Masters of the Universe, GI Joe, Action Force (the main reason for my joining) plus various fantasy figures.  There were several poses of skeleton available and I downloaded the standing pose, resized it to 15mm (reduce to 56% original size) and printed 6 of them.

3D printed skeletons painted and ready


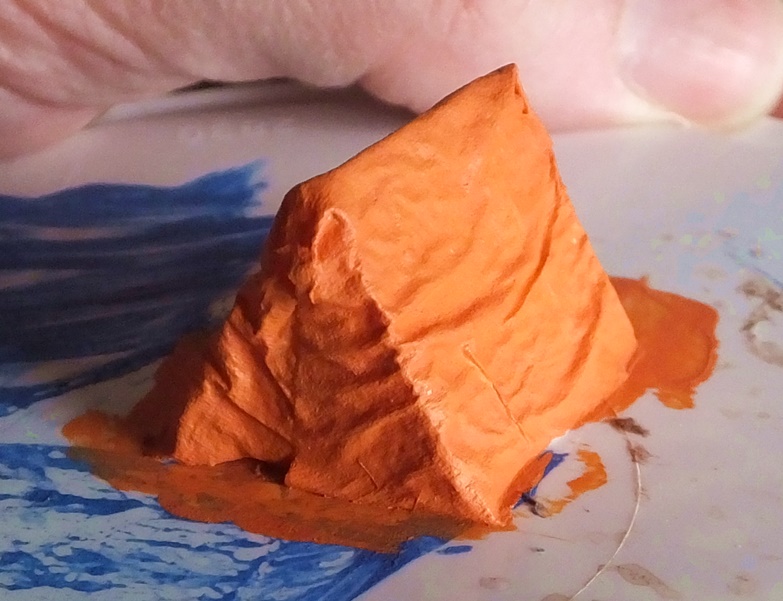
I lost a couple to snapped limbs while removing them from their supports, but I had expected that to happen and was surprised that I didn't lose more.  They received a coat of Vallejo bone and a mixed wash of black and sepia ink.  I also needed a tent, but wanted to build one the old-fashioned way rather than just 3D printing one.  I opted for a chunk of rigid insulation foam cut into shape with PVA soaked tissue draped over it and shaped with a damp brush to try and get the right sort of folds and creases.

Tent.

The tissue was painted with a nice bright orange (mixed from the red & yellow Wilko tester pots previously used for the flowers in the statue's flower beds) reminiscent of something like an old Vango Force 10.

Tent.

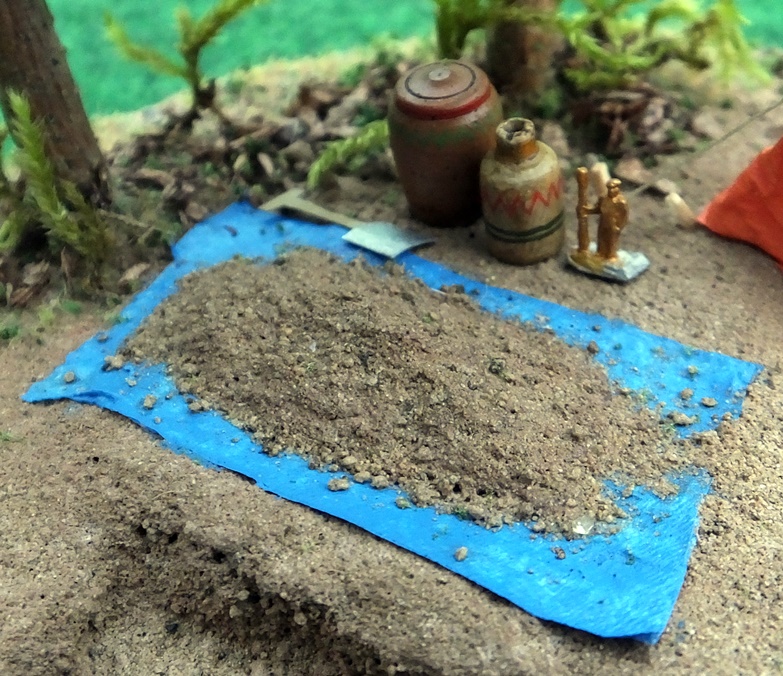
I also used a scrap of tissue for a spoil heap tarpaulin, this time using pale blue acrylic craft paint mixed with PVA to fix it in place.  2 of the skeletons were glued into the excavation with UHU and after that had dried for a few hours, I filled around them with more tilegrout/soil.  I used a dry, soft brush to arrange the "soil" around the skeletons and made sure the bones were brushed clean.  A spray of isopropanol and a few drips of dilute PVA from a pipette fixed everything in place.

Main groundwork completed.

The spoil heap was made with a small blob of the pulped toilet paper & plaster base mixture covered with the soil/grout and sealed with dilute PVA.  I gave the skeletons an extra drybrush of pure white to make them contrast more with the surrounding soil.

Excavation of the burials.

As well as the spoil heap, I added a couple of pots (Hirst Arts mould 59 Unique Inn Accessories) and a 6mm artillery crewman painted gold, presumably it's a statue they've dug up.  You can also see a spade there, this was just cut from a flat bit of card and painted khaki for the handle and GW chainmail for the blade.  Once the paint was dry, I curved the blade slightly round a paintbrush handle.

Spoil heap and a few artefacts.

The tent was stuck in place with PVA.  I used a couple of pieces of a staple for the spikes on top of the tent poles.  I carved some tiny tent pegs from a matchstick and PVA glued them into holes that I drilled in the base.

Tent in position.

The guy lines were made from pale thread,wrapped around the tent pegs and fixed with a blob of PVA.  After the gue had dried, I trimmed the thread down.  I should really have made tiny guy runners from matchsticks too, but time was ticking on and I didn't want to screw up what was looking like a reasonably good tent so far!

Guy-lines and hand-carved wooden tent pegs.

The final touches were to add the Land Rover and a few tufts of moss from the garden to add some variety to the plants.

The completed objective marker.

I decided to make the Land Rover a Time Team one and based the colouring on a few publicity photographs. The Time Team logo on the door was carefully hand painted.

Grave and Land Rover detail.

The design had changed somewhat from the original plan, the CD base lacking enough space to accommodate a finds table upon which to display the artefacts and a larger tent/shelter.  I was still very pleased with the end result though, the key features were all there and had turned out just as I'd hoped.

Doesn't look like Tony Robinson on the left?

I added a couple more card tools to the back of the Land Rover, a pick axe (should really have been a mattock!) and a Cornish shovel, both painted the same as the previous spade and with the shovel blade curved round a paintbrush handle.  The little rucksacks were 3D printed and extremely fiddly to paint.
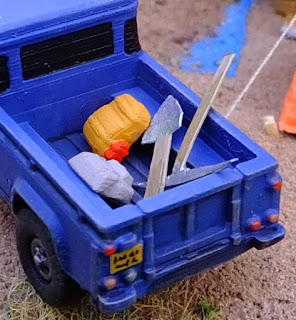
Tools and bags in the Land Rover.

What was even more pleasing was that this objective marker won first place in the AK47 Republic Facebook group competition! There was some very stiff competition and I was very surprised when I heard that I'd won.  Thank you to the competition organisers and well done to the other entrants, there were some excellent ideas there and I shall be copying some to use myself for future objective markers.

Monday, 4 July 2022

AK47 Republic - Objective Markers Part 6: Statue Objective Marker

My statue required a rather different base than the rest of my objective markers, so I saved one CD for this.  I had a pretty good idea of how I wanted it to turn out, but time would tell whether I could find all the materials that I wanted and assemble it to my satisfaction.

The plan.

I couldn't find my Hirst Arts blocks to build the plinth for the statue, but I did manage to locate some Linka low wall sections that would do instead.  Everything else I needed was easily sourced from my scenery supplies, and I decided to leave out the bench because I didn't want things to end up too crowded on the CD-sized base.

Basic materials.
 
I drew a grid onto the CD in pencil and glued cereal packed card paving slabs down with UHU for a strong, waterproof bond.  I used some pieces of Linka to make a holow square for the statue base.  At the time I couldn't find my pan scourers to make a hedge, but I did find some hedges I'd made previously.  I trimmed these down to the required size and fixed them in place with UHU.  Needless to say, I found the pan scourers and the box of Hirst Arts blocks the next day...

Starting to come together.
 
The card slabs were textured with a chunk of concrete I found in the garden.

Texturing the paving slabs.
 
The brickwork was painted starting with a taupe base coat, followed by a burnt umber overbrush that picks out the brick faces but leaves the cement colour in the recesses.  I decided to add an ornamental pattern with a different coloured brick in the centre of each panel, using Vallejo khaki.  A few bricks were picked out with red oxide and burnt umber with some black added.

Texturing and main painting completed.
 
I applied a watered down coat of taupe to the paving slabs to tone down their brightness and bring out the texture from the concrete.  The bare CD was coated with texture paint.

Texturing and main painting completed.
 
A grout/soil mix was applied over the texture paint, making sure I got it right into the gaps under the hedges.  2mm Autumn grass was applied over the soil areas outside the hedges, leaving the flower beds bare.
 
Ornamental planting under construction.
 
Small pieces of home-made clump foliage were added along the flower bed.  I added some blue "flowers" from foam I dyed in preparation for making alien trees.

Plant detail.
 
I wanted some brighter flowers too, so I quickly whipped up a batch. I tore a couple of small pieces of foam about 15-20mm in size from a handy car-washing sponge.  One had bright red paint squeezed through it, the other had "Bumblebee" yellow squeezed through it.  Both were cheap Wilkinson's emulsion tester pots.  After the bits of sponge had dried in the sun for a day, I dropped them both in a coffee blender together and shredded them finely.

"Flowers".
 
I sorted through the foam for the tiniest fragments to use as flowers.  Fine tipped forceps are essential for this! I made the mistake of trying to do it at a camp table outside in the sunshine but the occasional gentle breeze kept blowing away the little foam shreds I had ready.  The work bench in the garage proved to be a much safer location.

 
I applied small blobs of PVA to the plants and dipped each flower into the PVA as well before fixing it in place.
 
Placing the flowers.

Once everything was in place, I sprayed the flower beds with isopropyl alcohol, then dripped dilute PVA on with a pipette.

Flowers completed.

I sprinkled some more tile grout over the paving slabs, then used a wide, soft brush to gently guide it into the gaps between the slabs and along the edges of the paths. After another spray of isopropanol, I carefully dripped dilute PVA between the corners of the slabs and let capillary action draw it along the gaps to fix the grout in place.
 
Grouting between the paving slabs.
 
The edges of the base were touched in with taupe acrylic where necessary to hide the CD shine. I had intended to do something else to the paving slabs, maybe a lighter drybrush, but I was pretty pleased how they looked so decided to leave them alone.

Paving finished.

I cut a square section out of some rigid insulation foam and trimmed the height down so it fitted neatly inside the Linka plinth.  I put the statue in place (painted as detailed in my previous post), then glued some more grount & soil in the corners to finish it off.  Done!
 
Statue objective marker completed.
 
This fine statue is a place where subjects can reflect on the greatness of his Excellency, Dictator for Life and Champion of the Common Man (When Convenient), Aloysius M'Bemba, leader of Kalembeland.
 
Note the neatly patterned flower beds.
 
This turned out better than I expected and is pretty close to what I originally had in my head when I came up with the idea.  It will be a fine objective marker to use in a game of AK47 Republic and I'm sure that it will be useful for many other games too.

The great Aloysius M'Bemba.

May the blessings of Aloysius M'Bemba go with you!