Showing posts with label Old Crow. Show all posts

Saturday, 31 December 2016

Upgrading an Outrider - GZG mini-turrets and weapon mounts

I've recently been working on a second batch of Old Crow Outrider grav scouts to add to my reconnaissance force.  The original 4 are all armed with the standard Old Crow missile pod / machine gun turrets, as seen below.

Outriders with original Old Crow weapon mounts.

For the new Outriders, I wanted to try something slightly different but I couldn't decide on which turret style would be the best armament for them.  As luck would have it, I recently rediscovered my stock of 2x2 and 3x3mm Neodymium magnets, originally bought for attaching Full Thrust starships to their bases.  Sadly their original use didn't work very well, anything larger than a light cruiser being too heavy for the magnet to hold firmly, so I have a large supply which didn't get used.  Fortunately these will come in useful for my new project, I've already uses most of the 3x3mm cylindrical magnets to attach the turrets of my Glaive tanks, Claymore and Lancer heavy APCs.  The 2x2mm cylindrical magnets are ideal for these smaller turrets, just cut off the mounting peg on the turret, drill a suitable depth hole, dab in some superglue gel and drop in the magnet.

Outrider with 2x2mm magnet installed on top.

I have a good number of Old Crow mini-turrets.  Jez didn't have the metal gun barrels available when I placed my order so he threw in the mini turrets free with the idea that I can use some brass wire or something similar to make the guns.

Old Crow mini-turret.

Next we have a tribarrel mount from a GZG MAWP(W) (V15-24A).  The MAWP will also be magnetised, allowing it to share the range of armament options.  I've included a Peter Pig US Marine for scale, PP figures tend to be ever so slightly smaller than many Sci-Fi manufacturers such as GZG or Brigade/Armies Army etc.

Outrider with MAWP tribarret mount.

You can see some of the extra stowage I'm using, Brigade Models' jerry cans (from set SF15-906) and Ainsty Castings' etched brass stowage baskets (from set HS1014).  The little grab handle is just a piece of wire glued into a couple of small holes.

Outrider with MAWP tribarret mount.

 Next up is one of GZG's new mini-turrets, this one with a pair of quad missile mounts, V15-ACC29.

Outrider with twin missile mount.

Outrider with twin missile mount.

I rather like the look of the plasma cannon (V15-ACC27) too, so let's try one of those...

Outrider with Plasma Cannon mount.

Outrider with Plasma Cannon mount.

The twin machine gun mount (V15-ACC28) looks like it will make a good point defence weapon.

Outrider with twin machine gun mount.

Outrider with twin machine gun mount.

Finally I decided to give my old groundmount medium missile battery (V15-25D) a new lease of life.  Long-time readers of this blog may recall seeing this on a previous occasion, way back in 2010!  This should be useful if there is something too large for the point defence guns to handle.

Outrider with medium missile mount.

Outrider with medium missile mount.

I haven't seen any comparison photographs of these different turret/weapon mount styles yet.  Although there are photographs on the GZG web site with a scale next to them, I never find it very easy to visualise how big they actually are without a person for scale. That said, here is a comparison photograph of all the turrets I'm using, along with my crouching infantryman for reference.  Hmmm... thinking about it now, a standing figure would have been more useful!  I'll take another comparison photograph soon, I have a couple of other mini-turrets to work on as well.

Weapon mount size comparison.

Friday, 12 August 2016

Hammer's Slammers Week - Day 7 - Jeeps

Day 7 - Jeeps


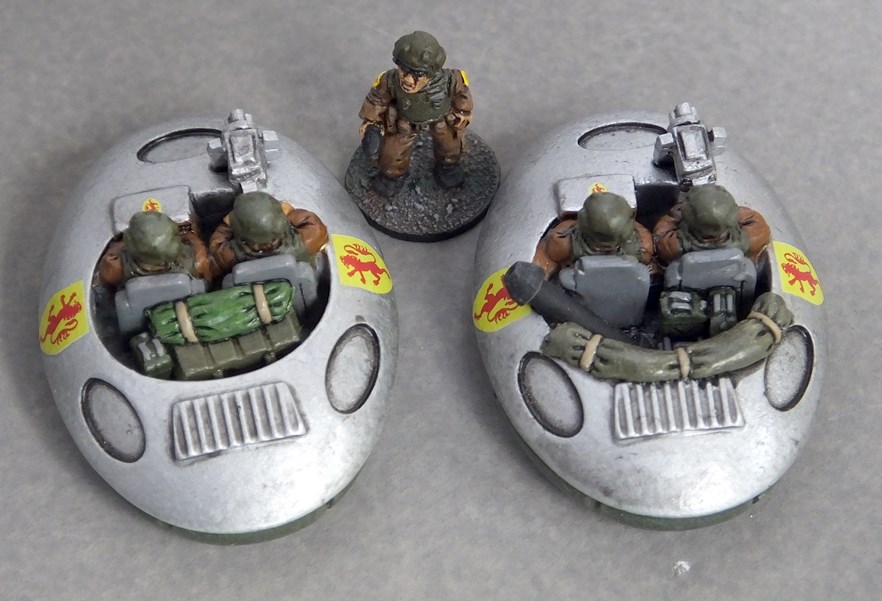
The 2 tonne A21 GEV jeep is a plastic-bodied, rubber/fabric skirted vehicle that the Slammers use for infantry support.  I ordered a couple of packs and Jez kindly threw in a couple of mortar jeeps too.  All have benefited from lots of extra stowage.  I was surprised to find that the jeeps are moulded with the crew in place.  There was a little extra cleaning up required around the crewmen but the rrsin that Old Crow use is very easy to trim away and it only took a minute or two for each jeep.  The gun jeeps come with tribarrels to attach, the cargo jeep has a small package of cargo to stick in the back and the mortar jeep is a single piece casting.

Gun jeeps
Lots of stowage in the back of my gun jeeps.  Brigade Models jerry cans and stowage boxes, hand sculpted tarpaulins, The Scene LAW (buzzbomb launcher for the Slammers).

Gun jeep stowage
Being plastic bodied, there is no reason for the jeeps to be silver like the big iridium armoured Combat Cars and blowers but I've painted them to match anyway, as in the Slammers rulebook.

Gun jeep stowage


 The gun jeeps act as fire support for infantry on their skimmers.


Gun jeep with infantry skimmers

 More extra stowage in the cargo jeeps with Brigade Models jerry cans and stowage boxes and some hand sculpted tarpaulins.


Cargo jeeps
 These were easier to clean up than the gun jeeps because there is only 1 crew member!

Cargo jeep stowage detail
Decals were easy to apply to the large flat sides of the jeeps, though tight trimming of the carrier film was necessary to ensure it didn't overlap the edges.

Cargo jeeps
One of my mortar jeeps still needs a little work - there was an air bubble in the end of the mortar tube so I need to rebuild it when I get an appropriate bit of tubing.

Mortar jeeps
Less stowage in the mortar jeeps but I added some extra ammo crates and a tarpaulin.

Mortar jeep stowage detail
So that's the end of Hammer's Slammers week.  Hopefully I might manage to keep posting a little more regularly for the remainder of the year!  Maybe I'll even manage to fit in another game or two.

End of Hammer's Slammers week...
Coming soon... Action Force - Red Shadows, Z Force and SAS Force...

Thursday, 11 August 2016

Hammer's Slammers Week - Day 6 - Support Vehicles

Day 6 - Support Vehicles

The Old Crow Slingshot GEV is acting as a command and control vehicle for my Hog battery.


I've added lots of extra stowage to this one including a couple of tarpaulins, The Scene ammo boxes, Brigade Models jerry cans and various grab rails.


As with the other vehicles, this has a metalcote base coat and reflective green skirts.  No replacement panels here - these are flexible skirts rather than the steel skirts you get on a Combat Car or a blower tank.  A Pledge/black ink wash finishes it off.


 This vehicle has large flat areas that make it easy to apply the decals!


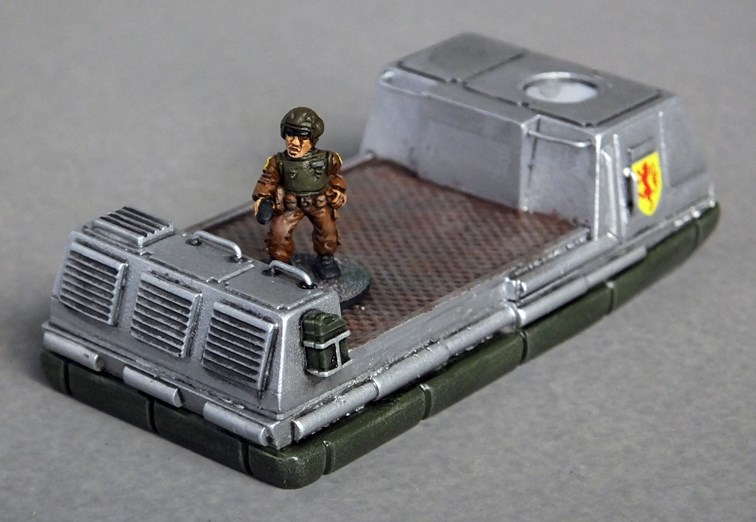
 For extra ammunition transport for the Hog, plus any general spares required by my Slammers, this GEV truck will be useful.


 Not many additions to this one, just a few grab rails and a jerry can.


 The stack of crates is removable so I can change the load as required for a scenario, or even use it to carry a few troops in an emergency.


I realised while taking these photographs that I haven't added the top hatch!  I must dig that out of my spares box, or perhaps try a small turret.

Wednesday, 10 August 2016

Hammer's Slammers Week - Day 5 - Cargo Car

Day 5 - Cargo Car

The M9A10 Cargo Car is essentially just a cut-down Combat Car.  Mine will help transport extra ammunition for the Hog.


Like the Command Car, this is another single casting.  I've added some guard rails down the side and a small tarpaulin to upgrade it from the basic model.


Some of the Hog crew might want to ride in the open Cargo Car instead of cooped up in their turret between fire missions.


Tuesday, 9 August 2016

Hammer's Slammers Week - Day 4 - Command Car

Day 4 - Command Car

Next up we have the M9A4 Command Car.  A very basic kit, just a single resin casting for the entire vehicle!  As usual, I've added a bit of stowage in the form of a Brigade Models jerry can, hand-sculpted tarpaulin and a small block of Old Crow stowage on the roof.

Command Car.

It came with a tribarrel to mount on the roof, I haven't decided whether to add it or not.  If I do, it will be a simple matter to drill a small hole and drop it into place.  The Old Crow resin is a pleasure to work with, very easy to drill and clean up.

View of rear door/entrance ramp.


Painting was the same as the Combat Car.  The ventilation grills received a blob of matt black which was quickly wiped off, leaving extra shadows between the slats.  The sensor domes also had a coat of matt black.

I have a couple of Command Cars, the second of which will be painted as a medical vehicle.

Monday, 8 August 2016

Hammer's Slammers Week - Day 3 - Blower tank

Day 3 - Blower tank

The M2A1 Blower tank is the signature vehicle of the Slammers.  I should have looked more closely before I bought these - I hadn't realise they came with moulded-on stowage baskets so I ordered far more etched brass stowage sets than I needed from Ainsty Castings!

Blower tank
 The blower was quick and easy to assemble and paint.  It still needs its tribarrel adding, I mislaid this during assembly but it has just turned up again!  I added a couple of extra tarpaulins and an ammo box to the stowage basket.  There were a few small bubbles here and some of the basket mesh was missing but this was easily covered up with my additions.

Rear view
Painting is as the Combat Car, metalcote polished aluminium hull, reflective green skirts, Pledge/black ink wash.

Side view
I know that Ainsty do a larger blower which is closer to the size needed for a 170 ton beast like this but I'm happy with the Old Crow ones, which at £4.50 each are really good value.

Turret/stowage detail
I have 7 more of these to assemble, 5 standard tanks and 2 command tanks.

Saturday, 6 August 2016

Hammer's Slammers Week - Day 2 - Hog

 Day 2 - Hog

I really like this kit, in fact I prefer it to the blower tank.  It has a satisfyingly chunky shape with plenty of places you can add detail.  The M53A1 mounts a rocket howitzer in the turret and carries a tribarrel for local defence.

Hog artillery vehicle
I did a fair bit of work on this one, adding grab rails/handles to all the rear hatches, a small pack of personal belongings on the back of the turret, Old Crow stowage on the turret roof along with a hand sculpted tarpaulin, plus some Brigade jerry cans on the back of the hull.

Hog artillery vehicle - tribarrel for air defence.
Having tried metalcote on the Combat Car, I used a different paint on this one, an old pot of Airfix silver enamel which came from my brother-in-law's old modelling box from the 1970s.  Still looks pretty good to me!  A coat of Pledge gave a good base for applying the decals, lots of decal softener was needed on the side of the turret to get that one to conform to the bulge of the hatch mounting.

Rear view - note stowage and grab rails.
The plenum chamber skirts were painted the same as those on the Combat Car and all the stowage received a wash of black ink.  A blob of matt black was daubed around the muzzle of the rocket howitzer then mostly wiped away, leaving a suitably sooty look.

Hammer's Slammers Week - Day 1 - Combat Car

I received the Hammer's Slammers: The Crucible rule book for Christmas in 2013.  Although I've only managed to play 1 game so far, (Tomorrow's War being my usual choice, despite its drawbacks), I quite enjoyed it and I'd like to play some more.  To this end, I've obtained some of the Old Crow Hammer's Slammers range.  Having a baby last year has severely reduced my time for painting, gaming and blogging (hence the months between posts this last year and a half) but I'm gradually getting back into the swing of things...

I've painted my first batch of Slammers vehicles to try various techniques and I'm pretty pleased with the results so far.  So without further ado, I present Hammer's Slammers Week!

Day 1 - Combat Car

Anyone who has read the Slammers books will be familiar with the M9A1 Combat Car.  This is a lovely little kit, a resin body with metal crew and tribarrels, plus an etched brass splinter shield to protect the fighting compartment.  The legs on the splinter shield seem slightly too wide/long for the body of the vehicle but this isn't a major problem, you just need to flex them slightly as you assemble the kit.  I drilled fairly deep holes for the legs to make sure it's a firm fit.  I left the crew and splinter shield off so they could be painted individually.  Some Brigade Models jerry cans were added to the back and I carved some footholds up the side of the vehicle for access to the fighting compartment.  I still need to add the stowage to the top of the splinter shield, hence the grey undercoat still showing there.  An Ainsty Castings etched brass control panel was glued inside the fighting compartment.

Combat Car.
After a spray of grey Wilko undercoat, the vehicle received a base coat of Humbrol metalcote polished aluminium.  Being metalcote, it's designed to be polished after it has dried, giving a lovely metallic sheen.  I gave it a coat of pledge floor polish afterwards to seal it and avoid leaving any fingerprints during later stages of painting.  I wasn't sure how well this would work but it seems to be fine, the polish coated without any difficulty and has prevented any more of the silvery coating coming off on my fingers.  The skirts around the plenum chamber were painted Vallejo Reflective green, with a few replacement panels picked out in Luftwaffe Camouflage green and Stonewall grey.  The inside of the fighting compartment was painted brown to start, then dabbed with red/brown to give a rusty appearance, finally drybrushed with silver to show wear.

Combat Car - note steps on left side and replacement skirt panels.

Next was a 50/50 wash of Vallejo black ink and Pledge which was applied generously over the whole vehicle.  This gave a good base for applying some decals.  As well as the etched stowage baskets from Ainsty, I ordered some Hammer's Slammers decals.  These are lovely quality, I trimmed very closely around them to minimise the amount of carrier film, then tried out my new bottle of Vallejo Decal softener.  I'm extremely happy with the result, they conform well to the curving shape of the Combat Car's hull.  After 24 hours to dry, a couple of coats of Pledge sealed the decals in place.

Fighting compartment detail.
Given that a Combat Car has steel skirts, I gave them a drybrush of Humbrol 160 German camouflage red/brown with a few patches of 100 red/brown for a nice rusty effect.  A further drybrush of GW chainmail gives a good impression of the sort of wear they've been getting.

Ainsty control panel, fighting compartment detail.


The crew were painted using the same colours that I used on the Slammers troops I painted for the GZG web page, Vallejo brown fatigues with Humbrol 86 light olive body armour and helmets, followed by a sepia wash.

I'm pleased with the result, so I'd better get a move on and finish the other four!

Saturday, 17 January 2015

Full scale war erupts on Charity!

Fighting on Charity stepped up a level last week when the Armed Forces of the Charity Freedom Alliance mounted a major armoured attack on a Neo-Colonial Commonwealth supply depot.  This was the first engagement to feature the opposing forces on an equal footing and casualties were high on both sides.

The battlefield - objective compounds marked A and B.
A small supply base in the equatorial village of Gnissig was the focus of the battle.  Two compounds were in use by NCC troops for storage of supplies.  AFCFA mounted a two-pronged assault to try and seize these depots.

Compound A
Defending the depot was a platoon of Sabre MBTs, 3 Lancer heavy IFVs, 4 Outrider scout vehicles, a Claymore heavy APC plus a couple of unarmed Badger liaison vehicles.

Compound B
Several fireteams of NCC marines were scattered through the settlement, both in the supply compounds and waiting in the Lancers ready for deployment.  Reports of the AFCFA column closing on the village led the Sabre crews to move their tanks into partial cover, main guns ready to engage any targets appearing near the main road into Gnissig.

First casualty - AFCFA Warhammer goes down!
AFCFA was fielding a strong force, 3 Warhammer attack Mecha, 2 Rifleman air defence mecha and 2 Longbow missile artillery mecha, re-equipped with anti-tank guided weapons.  A pair of Kamodo heavy IFVs transported 2 squads of hardsuit infantry, with 4 Stoat armoured cars carrying another squad.  A Kamodo fire support vehicle with a heavy autocannon provided additional anti-tank support.

Second casualty - another AFCFA Warhammer is lost!
The attack started badly for AFCFA, 2 Warhammer attack mecha on the left flank falling to the Sabre autocannon fire in quick succession.  Confusion on the AFCFA command channels led to their losing the initiative [Fog of War card "Wait, the General said what?!"] and they failed to regain it at any point during the course of the engagement.

Sabre MBTs prepare to inflict more casualties...
Things went little better on the right flank, an anti-tank missile destroying the lead Stoat with another being immobilised nearby.  Crew and infantry spilled out of the wrecked vehicles and dashed for cover in the nearby buildings.  Unfortunately, the large building into which most sought cover turned out to be a very flimsy structure which provided no cover whatsoever [Fog of War card: "What's this wall made of, Swiss cheese?"].  2 squads made the dash across the main road seeking better cover but both sustained severe casualties from machine gun and main gun fire from 2 Sabres.  The uninjured troopers managed to drag their wounded comrades into cover and set about delivering first aid.

Stoat destroyed!  Luckily all aboard manage to scramble clear.
The left flank was getting congested!  2 Rifleman mecha moved up to support the remaining Warhammer, but wreckage was leaving the AFCFA troop carriers confined, with little space to manoeuvre.  The infantry hastily debussed and took cover amongst the storage containers, leaving the IFS ready to reverse to find better positions.  The remaining Warhammer concentrated fire on Compound A, destroying the larger building at the nearest end.

2 'Mechs down and serious injuries in 2 infantry fireteams.
Those AFCFA troops remaining in the indefensible building pressed forwards into a smaller but sturdier building, then used this to launch an attack on Compound B.  The Stoat crew went first but both fell to NCC marine fire before making it to the building.  The fireteam following had more success, downing 3 of the NCC defenders and dashing to the cover of the compound wall.

Stoat crew are down but return fire from other AFCA troops eliminates 3 NCC marines.
Forcing an entry into the building, their luck ran out and the AFCFA troopers now succumbed to overwhelming fire from the surviving NCC marines.  The attack on Compound B was a failure.

One AFCFA fireteam succeed in entering Compound B but are overcome by the defenders.
Now the tables started to turn.  A shot at one of the Sabres resulted in only minor damage to the sensors, but the crew panicked and bailed out.  "What the Hell are you doing?  Get back in that damned tank!"  Gun camera footage captured the entire episode [Fog of War card "That won't play well on Youtube!" means -3 victory points), the jittery crew diving for cover behind the Sabre before realising their error and clambering sheepishly back in.

A jumpy NCC tank crew bail out of their virtually undamaged Sabre.
Right back at the outskirts of the village, the Kamodo FSV risked edging forward to take a shot at one of the Sabres covering the main road.

AFCFA fire support vehicle takes out a Sabre at long range.
Success!  The resulting explosion destroyed the Sabre, the crew managing to bail out before it brewed up.

Sabre destroyed - but the crew all make it out alive.
2 more Mecha had moved in, Longbows which were usually equipped with artillery missiles but on this occasion carried anti-tank missiles instead.  One moved to support each flank of the AFCFA assault.

NCC armour masses near Compound B.
They now faced a build up of NCC armour on the right flank, 2 outrider Scout vehicles, 3 Lancer IFVs and the temporarily abandoned Sabre MBT.

AFCFA infantry assault captures Comopund A.
The left flank was not as heavily defended and the AFCFA troops mounted an assault on Compound A.  The first fireteam balked at the command and hunkered down in cover outside the building.  "Come on lads, shoe 'em how it's done!" cried the leader of the second fireteam and in they went, clambering through the rubble left from the Warhammer's destruction of the main building.  Vicious hand to hand fighting resulted in one AFCFA casualty but the entire defending NCC fireteam was taken out of action.  Compound A had been captured!

Warhammer particle cannon destroy a Sabre.
Moving forward in support, the Warhammer pressed home an attack against a Sabre, destroying the tank.

Sabre destroyed - but the Claymore fights on undeterred.
Despite the destruction of an MBT within feet of their more lightly armoured vehicle, the Claymore crew remained unshaken and prepared their heavy autocannon.

Return fire destroys the Warhammer, but at least the pilot survives this time.
Their fire proved just as accurate as the Warhammer's and the disabled Mecha keeled over backwards.  The pilot dragged himself from the wreckage and sought cover nearby.  Missiles streaked in towards the remaining Mecha but the combination of their detonation fields and countermeasures meant that the fire did little more than minor damage to weapon systems.

Longbow Mecha also falls.
Autocannon rounds and anti-tank missiles continued to flash back and forth on the right flank and finally the Longbow went down - but at a cost to the NCC defenders.

NCC troops reinforce the defences of Compound B.
One Lancer sat smashed, leaking black smoke, another was damaged and unable to fire its weapons.  There were casualties amongst some of the supporting infantry.

Sabre crew pile into their ride home.
One of the Sabre crews scrambled into a Badger.  They couldn't contribute anything more to the fight but at least they could get home safely!

Overall, this game was a narrow win for the Neo-Colonial Commonwealth.  One supply depot was successfully defended, the other was captured.  5 Mechs were destroyed but the NCC lost only 2 Sabres and a couple of Lancers.  The bad publicity video of the NCC crew abandoning their tank wasn't enough to swing things completely in AFCFA's favour!

Of concern to the NCC now is the fact that AFCFA appear to have access to vehicles and large combat Mecha from the Guavan Defence Force.  The GDF have not been kindly disposed to the NCC since the fighting on Libelula, when Assault Cyborgs were used against regular GDF troops,  followed by a special forces raid on a GDF outpost.

Casualties from both sides were repatriated quickly at the end of the battle, NCC analysts now wish they had been given the opportunity to question some of the AFCFA troopers.  The ease with which they operated with the Mecha and their higher than usual standard of marksmanship and training has raised suspicions that these were really GDF troops in disguise.  AFCFA have claimed responsibility for the attack, so any GDF troops must be operating with their blessing.