Showing posts with label Board Game. Show all posts

Tuesday, 29 April 2025

Rock Hard 1977 Board Game

Graham came round again for a games evening and our next door neighbour Matthew joined us too.  Graham brought Rock Hard 1977 for us to play, where you play a 1970's wannabe rock star.  This game was designed by Jackie Fox of The Runaways, so has the insider's view of what might be involved.
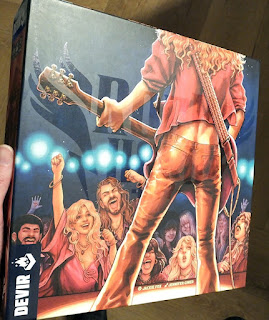
Rock Hard 1977

There are a number of characters to choose from, drummers, guitarists (bass and lead) and so on.  This can make a difference, your career can affect what certain cards do.  You also get a set of counters including a demo tape, record deal, fame marker (star), little red cubes to mark your royalty level and certain objectives.

My character, Leo Love the bass guitarist..

The parts fit into one of the best character boards I've come across, disguised as an amp.  Dials at the top record your current level of "chops", "reputation" and "songs" (required at certain levels to perform at different venues, also to improve your career), amount of royalties you're earning, candy "craving" (more on that later...).

Character board.

The game board is double sided depending on whether you have 2-3 or 4-5 players.  It records your "fame" around the edge of the board, whoever has the highest fame at the end of the game wins.  The accumulates during the game and there are various end-game bonuses available too if you meet certain criteria.  The next row, on the left an event card is turned over each month, next to this there are production, performance and publicity bonuses and on the right is the calendar.  Each turn represents a single month.  Every few months, you have to pay your manager.  The guitar picks mark the play order for the current month, something which can become extremely important as the game progresses.

The bottom 3/4 of the board is taken up by the day (yellow), night (green) and after hours hang-out (red).  You need certain prerequisites to perform certain tasks, and the lower down the board you go, the more difficult/expensive the tasks are, but the greater the rewards.  All of them have a requirement (marked in blue), cost (marked in red) and a result (marked in black).

During the day, you might start off with a radio interview which requires and costs nothing but earns you 1 reputation point.  You'll probably want to rehearse, either in Studio A costing $1 and earning you 1 Chops, or Studio B costing $2 but earning you 2 Chops.  You'll need to hire some crew, the cost of which increases depending on how many crew you already have and which box you manage to occupy.  As you can see, there are varying numbers of spaces for each task, some have only a single spot available, others are unlimited.  This is where turn order becomes important, because if you really need to complete a certain task, you need to  ensure you are early in the turn order, but more on that later!  Your aim is to get a record deal, for which you need a demo tape, and a minimum of 3 chops, 3 reputation and 3 songs.  You can improve the record deal as the game goes on, earning you more royalties each turn.

At night, you can go to a rehearsal studio, or perform at a venue. The starting venues require either 3 reputation (Fox Den) or 3 chops (TJ's) and earn you a point of fame and either 1 point of chops or reputation.  The next level requires a higher reputation or chops, and you also need 3 songs and a crew member, but you earn 3 fame, 1 chops/reputation, and if you're there first, you earn $1 too!  This is where my manager comes in, he earns me an extra $ every time I play at Panda Palace or Yenser Arena.  Requirements increase until at the very end of the game, you might have enough to play at the Carter Stadium.  There will also be a Random Gig every month, could be playing a Bar Mitzvah, a college party, all sorts of things.  They tend to get better as the game progresses.

After hours, you can choose to hang out at one of a number of different clubs etc, gathering cards with various icons which may come in useful for victory points at the end of the game.  I can't remember what all the icons were but the yellow ones (two wine-glasses) were "fun", the red (lips) were "Romance".  You can also choose to record a demo tape or even "go to bed early".

Above the day/night/after hours section are 4 other options, all of which can have any number of players occupying them:  "Donate Blood" (earning you $1), "Write a Song" (earning you one song), "Work" (carry out your job as per your job card) and "Buy or Sell Candy" (earning/costing $1.  This seems a good time to talk about "Candy", which most readers will have guessed is a euphemism.  Everyone gets one piece of "Candy" at the start of the game, and you can acquire it through various card events (eg the college party).  You can take a piece of "Candy" during your turn to try and get an extra action.  There is a deck of cards for the "Candy", you draw one to find out whether you have "soft candy" (1 extra action), "hard candy" (2 extra actions) or "candy" that has been cut so it has no effect. Then you turn your "craving" dial up one point and roll a die to see if you have developed such a strong craving (if you roll under your current craving level) that you need to go into rehab "recovery" for the next daytime turn.  Certain activities can't be done when taking "Candy", such as working, playing a gig, going to bed early, going to the rehearsal studio (though curiously you can give blood when under the influence!).

You will see that some activies have a black and white guitar pick shape by them, containing a number.  This gives the turn order for the next month.  So, if you really want to bag that record deal, make sure you "Go to Bed Early" to be the first player on the next turn to ensure you get the only available spot!  The "After Hours" clubs have a random number, these are little counters that get shuffled at the start of each month.

The game board.

Ready to start... every character has a manager who has a special skill, in my instance I get an extra $ if I play at 2 venues.  Everyone also has a job, in my case I'm a veterinary assistant.  I earn $2 per day and have to work evenings, making it difficult for me to play a gig without missing work.  You also start with some life experience, giving you one of the "after hours" icons to start with.  Everyone has two secret objectives, mine were to earn more "romance" after hours cards that the one with the blue cameras icon (as received in my life experience) and also to earn more fun (yellow wine glasses) than any other single colour.

Ready to start!

Every month an Event Card is turned over.  These have very random effects.  They might mean a venue is unavailable one month.  Another reduced the cost of acquiring a crew member that month by $1 (meaning that someone actually got their first crew member free!).  For the last turn, we drew the "Bad Candy" card which meant that no-one could use Candy that turn, foiling a couple of players' plans!


Mid-game.  You can see that I've missed work once, earning the "missed work" counter on the left.  If you miss work 3 time, you lose your job.  My character worked evenings, meaning I had to miss work in order to perform at a venue.  Other players had characters who had the option to work late nights, or rolled a D6 to see what time of day they had to work each month (with variable pay depending on time of day).  One character was a waiter and rolled a D6 to determine how much they earned in tips each time they worked... they rolled badly and lost $2 two months in succession because the customers walked out without paying and it was docked from their earnings!  I have some "candy" (pink sweet) and a crew member (top right).  I've used my manager when playing a gig to earn my extra $1 (manager card turned sideways). I've also got a record deal, indicated by the little cardboard record token.  (To get the record deal, I needed a demo tape first, you can see that top right, next to the character board.)

Mid-game.

There are counters for candy, crew, and "missed work".

Candy, crew and "missed work" counters.

End of the game.  I missed work 3 time, so lost my job, but I'm earning enough that it doesn't matter.  I have 2 crew members and I've hung-out a lot.

End of the game.

You can see the results of some of the "After Hours" card here.  Some give you a straight benefit such as extra money or reputation, others provide candy.  Some give you a choice which may be two possible good options (earn $1 and a song, or 1 reputation), or varied options (earn 2 reputation but lose next daytime turn or lose 1 reputation but earn an extra daytime turn).  I also gained 4 red lipped romance cards, so gained extra victory points from one of my objectives.  I also earned extra for one of the production/performance/publicity bonuses along the top of the board.  These tended to give various levels of fame as a reward, 8 for having the most of something, then 5, 3, 1.

All the places I've hung out.

This was my favourite card, not one that I drew but definitely worth remembering!

Not one I got, but the best one I saw in the game!


 We also received bonus fame for every skill that had reached 11 on the amp (chops, reputation & songs) and I got extra bonus fame for having all 3 at maximum.  Some of the Production, Peformance and Publicity fame bonuses were picked up too, with points awarded 8 for the most, 5, 3, 1.  You also earn 1 fame point for every $3 that you still have at the end of the game.  I haven't mentioned the currency yet, the game comes with dollar bills which come "pre-used" with coffee-rings, stains, doodles, really great quality!

Graham won, I was second (thanks to a lot of end-of-game bonuses), Laura third and Matthew fourth (the bad luck with the pay really delayed him over a critical couple of turns).

 Not knowing much about rock (unlike Graham, who is a big fan), we weren't sure what we'd think, but we all really enjoyed the game.  It's all fairly easy to follow, no music knowledge is needed (though thinks make more sense if you know a bit, eg needing a demo tape before you can get a record deal etc), cards and tasks generally explain pretty clearly what they need and how they affect things.  Great fun!

Tuesday, 25 March 2025

Trekking the World Board Game

 Trekking the World from Underdog Games is an excellent board game that we've recently played a couple of times with our friend Graham.  Each player has to travel the world, touring interesting sites and gathering souvenirs from their journey.  These earn you points, all of which are added up at the end.

The World
 You travel the world by moving along the lines connecting the different locations marked on the map.  The world is divided into continents, the significance of which will become apparent.  Each continent contains one airport and a number of other locations.

The card pool.
 Each turn, you choose an itinerary card from the row of 5 along the bottom.  Each card provides some income from odd jobs you do as you travel (in the centre), a distance that you have to move (in red at the top, you must move the distance shown), and some souvenirs you can gain if you end your move in the correct continent. The 4 top cards are tours that you can take if you end your move on the matching location and pay the required tour fee.  These earn you victory points.  The middle row are "encounter" cards which give all sorts of special effects, including bonus end game victory points if certain conditions are met, the ability to swap the colour of souvenirs earned, moving to any location in the world etc.  These can also be earned if you end your move on the matching location.  Whenever a card is taken, the space is refilled from the draw deck.

My suitcase.
 As you gain souvenirs, you add them to your suitcase.  Each column of souvenirs gives you 5 points at the end of the game.  As you fill each row, you pass markers that give you a little card chit marked in relation to the souvenir type.  Blue ones allow you to make a free move to any airport in the world.  Red tokens allow you to move an extra space.  Yellow tokens allow you to double the amount of money you earn from your itinerary card.  Black tokens allow you to double the number of souvenir markers you earn from your itinerary card.  One encounter card gives you extra victory points if you collect an entire row of souvenirs, another allows you to swap the colour of some souvenirs (handy for completing a column or two to earn extra victory points).  Graham's game is the second edition, which includes sturdy cardboard suitcases with little holes into which you place the souvenir cubes you earn.

 Assuming you have collected enough money on your travels so far, you can spend some of it if you end your move at the correct location.  More expensive tours earn you more victory points, I think the cheapest tour earns 10 points but the most expensive might have been 23 points.

Example encounter card.
 The encounter cards can be saved to play at the appropriate time.  Each one has a little description of the encounter that occurs, followed by the rules that tell you the game effect.

Angkor Wat card - tour side

  The game ends after one player completes a certain number of tours.  This number varies depending upon how many players there are, and whether you want a long or a short game.  With 3 players, we played our first game to 3 tours, but on the second game, we played to 5 tours.

Angkor Wat card - encounter side

 The game is very efficient in its use of cards.  The tour cards all have the encounter for the same location on the reverse, meaning that you only need 1 deck of cards for both the encounter and tour decks, saving space in the box.

My ending collection.

The game involves a lot of strategy and decision points:

  • Do you concentrate on collecting souvenirs? 
  • Do you concentrate on completing more tours?
  • Do you try and complete the necessary number of tours quickly, completing low scoring but cheap ones in the hope you can end the game before others get many points, or...
  • Do you try to score higher tours but risk missing out on one or two at the end because someone else has completed all 5 first?
  • When do you play your tokens to earn extra money or souvenirs?
  • Do you try to end your move to collect an encounter card, complete a tour or earn some souvenirs? (Can you do more than one?)
  • Do you take an itinerary card to earn more money this turn, or do you need to travel further instead?

Because you have to move the exact distance shown on your itinerary card, you need to think two or three moves ahead, but beware!  One of the other players might pick the itinerary card you needed, or use one of their saved encounter cards to let them get to the tour or encounter that you wanted to reach on the next turn.

The final scores.

Laura won our game.  I completed the fifth tour first, the other players get a chance to take their turns if necessary so that everyone has completed the same number of turns overall.  Because I had rushed to get the last tour done, Graham was not in a position to complete more than 4 tours, but he had completed 5 souvenir columns in his suitcase and earned an encounter card bonus for completing an entire row.  I had my 5 tours and a bonus score from an encounter card because I had 2 completed tours from the same continent, but only 3 complete columns of souvenirs.  Laura managed to complete her fifth tour in her turn and had 6 columns of souvenirs.  Despite not having any encounter card end game bonuses, having completed the highest earning set of tours and the highest number of souvenir columns gave her a clear victory.

It's a really fun game, simple to play but with great depth, lots of decisions to make, and it's well worth a go if you ever get a chance!  (You can find it on eBay for about £22 at the time of writing.)

Thursday, 9 January 2025

Escape from New York board game

 Our friend Graham came round again recently for a game of Escape From New York by Pendragon Game Studio, based on the 1981 John Carpenter film of the same name.  Graham has a Kickstarter version with various extras (figures, extra cards etc).  The aim of the game follows various parts of the film plot to rescue the president, find "The Tape" and/or escape.

You take the part of one of the 4 main characters in the game.

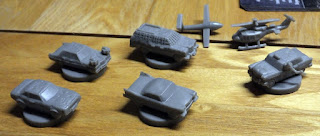
There are lots of little models with the game including 4 cars, the Gullfire glider, rescue helicopter and the Cabbie player's cab.

The detail is very good - the Cabbie is even leaning out of his window with a Molotov cocktail!

The board features the Library in the centre as the starting point. Above and to the left is the World Trade Centre with the Gullfire Glider on top.  The red cards are POI (Points Of Interest) where important items for winning the game might be found.  The city is revealed by drawing cards as you explore.  Each tile has a single vertical road linking to a tile above and below, and 2 horizontal roads linking to 2 tiles on each side.  Some roads are blocked by the barricades.  Having the columns of tiles offset works really nicely, a bit like having hexes, but it's much easier for the roads to line up.  I might try something like this if I make some terrain tiles of my own some time, it would certainly be far easier to cut out square tiles instead of hexagons, and easier to mark on the terrain features to match up between tiles.

Every player has 2 personal objectives: 1 object and one means of escape.  Ways to escape are by helicopter (once it arrives), in the Gullfire glider (assuming it hasn't been destroyed by prisoners), by raft (hidden under 3 or 4 of the question mark markers around the edge of NY) or across a bridge (which requires a diagram of the bridge, found during the game).  Objectives include things like "The Tape" and the "President's Bracelet".  As you play the game, you can "level up" by killing prisoners and/or collecting equipment. At Level 1, you can choose one of 3 extra-special action cards to add to your hand.  At Level 2, you can add an extra card and change one of your personal objectives (can be handy if game events affect your existing objectives).  When you reach level 3, you can change a personal objective and are also able to win a "lone victory" by having the object required and the appropriate exit route.  Alternatively, you can win a "collective victory" by escaping as a group across one of the bridges, but more on that later...

Many of the roads through the city will have barricades blocking the way.  These can be broken through to clear the way, flipping the barricade marker to show this.  The detail on these is fantastic!

As you explore, you find equipment (green supply crates), ammunition (piles of bullets) and prisoners (2 varieties of red figure who will attack you during the game).

Our characters were the Cabbie, Snake and Maggie.  I started the game in my cab which grants some extra abilities.  Cabbie isn't shooty like Maggie or Snake, but can run people over instead.  Yay!

You hold a hand of action cards, 2 of which can be played each turn.  Actions generate noise, the more noise you make, the faster things happen in the game, the more difficult it will get and the more likely you are to be unable to Escape.

Off I go in my cab.  Action cards allow you to do things like attack, or in this instance, to move onto an adjacent tile and reveal another adjacent tile.  The tiles contain 2 markers, either a prisoner (place a prisoner on the tile), an event (draw a number of event cards equal to the event level, which increases during the game), an equipment crate (draw an equipment card), a sewer grate (certain cards allow movement between another sewer grate as if in an adjacent tile), a car, or a building which might provide healing, protection, equipment or ammunition.  Driving my cab means that when I end the turn in a tile with no prisoners, I can move to another adjacent tile, then reveal a tile adjacent to that.

Snake moves to a Point Of Interest and finds some equipment.

Maggie moves to another POI and discovers Romero.  The "Boss" characters often have some important item that gets dropped when they are killed, so you have to eliminate them in order to get some of the items you need to escape.  They are much tougher than the ordinary prisoners.

My Cabbie vrooms into another tile, and his action card allows him to swerve into the prisoner and deal 2 damage by running him down.  Prisoners usually have only 1 wound, so he is killed.

Action cards allow Maggie to do a lot of damage to Romero and the prisoners in her tile.  If you have a gun, you can spend bullets in your turn to do extra damage in addition to any caused by the action cards you have played..  With all opponents killed, Maggie retrieves one of the 4 cases hidden about the board.  These cases contain items vital to the heroes' escape.  This one contains a "Diagram of Bridge 4" which would allow us to cross it together to score a collective victory, as long as we have the President with us.  Now, where is he hiding?

I move into a POI - turns out that I've found the President! But uh-oh, a lot of extra prisoners appear...


1 extra prisoner is added to each surrounding space once this card is revealed.  But at leats a get a model of the President to put next to my character card!  I also reveal all the other red POI tiles, land the helicopter on the helipad marker in the park.  Now that we have the president, we can try to complete a collective victory.  You may recall that my means of escape for a Lone Victory was the helicopter, so it's useful that it has arrived.  One of the action cards in your hand allows you to steal an item from another player (the card is then discarded, so it's a once-only chance) which might be useful for securing a Lone Victory!

I haven't mentioned yet, but after each individual player's turn, "The City" has a turn where you track how much noise they have just made (marked on the action cards) and either discard or draw a card from the City deck to find out what happens.  Prisoners in adjacent tiles might move into the tile where the player has finished their turn, indicated by arrows showing the directions from which they arrive. Roadblocks prevent the prisoners moving from certain directions.  In this case, they all pile into me!  When you take injuries, you lose random action cards from your hand.  When your hand runs out, you reveal the top card from the "Master Life Clock" deck which moves the game forward in various ways, eg increasing the number of event cards drawn when an event occurs.  When the Master Life Clock cards run out, you lose the game.  The Master Life Clock cards also get turned over when you have made enough noise to move The City noise tracker far enough, so the more you try and do, the faster time runs out for you.

Maggie uses one of her action cards to enter the sewer grating on her tile and re-emerge from the grating next to mine, then shoots several of the prisoners.

On my next turn, I use a special action card that lets me move from one POI tile to any other POI tile on the board that has already been revealed.  Because they were all revealed when I found the president, that gives me a good choice, so I flee across the board.  Unfortunately, 2 Boss characters have also ended up nearby...


Snake has killed the prisoner driving one of the cars.  He can now jump in the empty car and take advantage of the advantages it brings.  You can drive a car into a roadblock to destroy it (though Snake has an action card that lets him move through roadblocks, which is very handy), take a willing passenger with you on your move, or at the end of your turn, if in a tile with no enemies, you can take an extra move and reveal another tile.

Maggie returns through the sewers and emerged next to Slag, then attacked him.  Luckily she's on a tile containing a Police station which stops her taking any damage while she occupies it.  Boss prisoners can take varying amounts of damage, so Slag is still alive.

Earlier in the game I found a baseball bat with nails in it from an equipment marker.  This will add 4 to any damage that I do using an action card.  I select the action card that allows me to swerve into the tile and crash into Slag, doing a total of 2 + 4 for 6 damage which is enough to finish him off.


With Slag dead, I get to pick up the briefcase he has dropped.  Next turn, I swerved into Duke's tile and eliminated him too, though he never dies, just re-spawns on his home POI tile.


Snake suddenly finds himself outnumbered as he explores the far left side of the board.  We need that last briefcase!


My Cabbie uses his special card to travel to another POI on the far right of the board to get the final briefcase.

In the briefcases I've just collected, I have the President's bracelet and a diagram of bridge 2. 


I've got enough to level up to Level 3.  I choose to change my personal objective object from "The Tape" to the "President's Bracelet".  This POI is quite close to the helicopter, if I can make it there, I can score a lone victory and escape!  No need to wait for the others to make a Collective Victory.

Snake makes a break for it to get away from the prisoners.

He makes it to the roof of the World Trade Centre, eliminates the prisoner there and because he has the right object and means of escape available, he uses the Gullfire to escape for a Lone Victory!  It was lucky that we only drew a single card adding a prisoner to the roof of the WTC, when you have enough there (4 or 5 I think it was), the Gullfire is destroyed and lost as a means of escape.

The game was really fun, lots of neat mechanisms that ratchet up the tension and replicate various events from the film.  Using your hand of cards as your "life force" provides a great way of ensuring everyone stays in the game the whole time, but penalises you by reducing your options during your next turn or forcing you to refresh your hand by accelerating the game timer.  I've already mentioned that the offset column layout of game tiles is very ingenious.  Some of the game cards have multiple uses, for instance the action cards that "The City" plays when you've made noise are marked on the reverse with a picture of a city tile with arrows showing which direction prisoners move from into your tile.  This random movement means you never know quite which of the 6 adjacent tiles someone will come from - if unlucky, it could be most of them!

There are extra game options in the Kickstarter expension pack, including Police objectives and Police figures that are used to carry them out.  Apparently there are other expansions that incorporate other John Carpenter films such as They Live! (collect spectacles etc as you go round the map) and Hallowe'en!