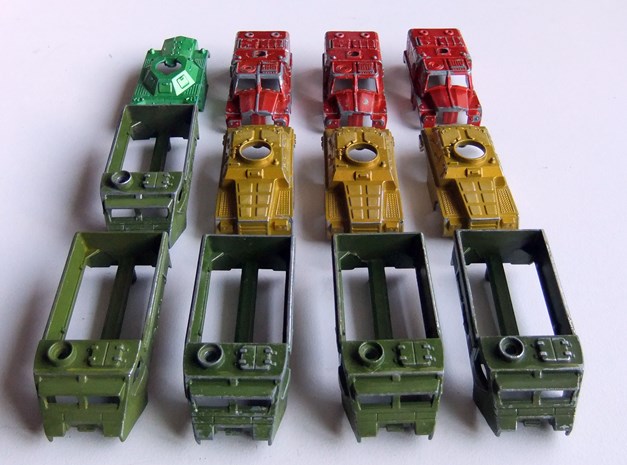
With the rivets drilled out, the body shells are all ready for the next stage of their treatment...
 |
| Body shells separated and ready for cleaning. |
A steel file takes care of any obtrusive mould lines and a quick once-over with fine grit wet & dry paper finished them off. I took particular care to ensure the top edges of the troop compartment were free of paint and had a good key for gluing. After this they get a good rub-down all over using a brillo pad (ie. steel wool), then a scrub with an old toothbrush and some washing up liquid to give a good surface onto which I can glue/paint.
 |
| After filing, sanding and steel wool |
I've used 1.5mm thick plasticard for the roof of the troop compartments. I held this in place, flipped each one over and ran a bead of superglue along the inside. The glue gets drawn into the join by capillary action and I don't end up with any unsightly blobs on the outside.
 |
| Basic plastic rectangles trimmed to size |
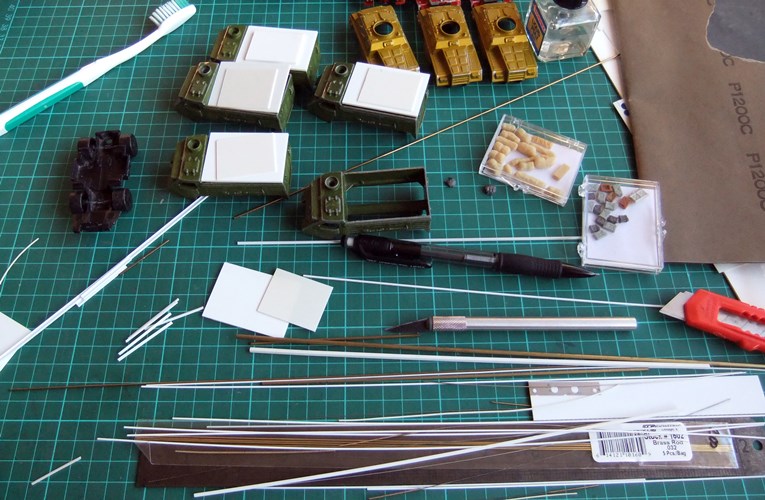
I'm using all sorts of bits for this project. Behold my construction table - A2 cutting mat, a couple of craft knives, razor blade, heavy duty 60cm aluminium ruler, an assortment of 1mm and 0.5mm brass rod plus several different sizes of brass tube, plasticard, square section plastic rod (in various sizes), polycement, wet and dry paper, toothbrush, assorted plastic angle sections (H-beams, I-beams, T-section and L-section), a couple of plastic boxes containing jerry cans and general stowage.
 |
| An assortment of the stuff I use. |
My APCs will need some sort of top hatch, I've fashioned these out of 0.5mm plasticard apart from the one at the back which has 1.5mm - but more on that later...
 |
| The APCs take shape... |
Now is the time to experiment. I thought that some of my various vents and grilles from
The Scene's building accessory range might be useful.
 |
| Trying a couple of The Scene's vents. |
He also makes nice hatches and chunky air conditioning / extractor fan units.
 |
| More from The Scene - vent, hatch and A/C unit |
Hmm... let's see just how much stuff we can add...
 |
| OTT stowage and bits. |
This now has the following: The Scene hatch, vent and A/C unit, Continental Model Supply Company stowage bundles and modern UK ammunition boxes (7.62mm and 120mm), Italeri jerry cans, Airfix M2 Browning (in CMSC gun mount).
 |
| OTT stowage and bits rear view. |
I know it looked good but I haven't got enough spare parts to do all my APCs! So it's on to something simpler. I've used some treadplate in what seems like a logical place where someone will be clambering out of the top hatch.
 |
| Some more details added. |
T-section girders form the edges of a stowage area in the middle,
L-section girder hides the join between the plasticard and the back of
the cab. Brass rod will be the hinges for the top hatch.
 |
| The hatches now have hinges. |
I found a couple of old metal backpacks in my bits box. I don't know where they came from but they'll make some nice extras for a couple of the vehicles.
 |
| Some backpacks as extra stowage. |
Finished! Jerry can added in the stowage area (actually, I think I might need to add a rectangle of thick plasticard too, to serve as a first aid kit). I've engraved a line to separate the doors of the top hatch and added handles. There are vision blocks made from 1mm square plastic rod added around the edge of the roof.
 |
| Finished (until I think of something else to add...) |
|
|
Here they are in formation. More on the turreted one at the far end next time!
 |
| Ready for painting. |