For my second game of Rogue Stars, I got out some scenery, printed out some character sheets and quick reference sheets, plus my new plastic counters for tracking wounds, stress and pins. This will be a game where XP is earned by holding as many pieces of terrain as possible ("Control Terrain" mission from the book). In practice, this will probably mean trying to kill as many of the enemy as possible so that they can't contest any terrain! Rather than rolling for location, I just used the scenery I had readily to hand. I can't remember what I rolled as a complication for the game, whatever it was I forgot about it entirely and it never came into play.
The "Wolf Boys" have been terrorising the local population and are stockpiling stolen/blackmarket weapons, food and technology just out of town. They've killed a family and are using their homestead as a staging area in preparation for shipping out the goods. Bajj Maranti and her crew have been hired to recapture as much of the stolen merchandise as possible, and if the wolves get in the way, they'll be dealt with in extreme prejudice...
 |
The "Wolf Boys"
|
The Wolf Boys are all BIG and have CLAWS. Most are also ALERT, AGILE, DIFFICULT TARGETS, FAST, PERCEPTIVE, STEALTHY and TOUGH to varying degrees. The commander (LEADER) has an SMG, two have heavy blasters and one a laser rifle and medkit (plus MEDIC skill). Total 209 XP.
 |
A small shrine to the East.
|
The area includes a small shrine and the destroyed house to the East.
 |
Some of the stolen supplies.
|
Cargo crates and storage pods are piled in several holding areas across the site.
 |
Transport to the West.
|
To the West is a light transport being prepared to take the first shipment. A large building to the North houses more stolen goods.
 |
Bajj Maranti and her team.
|
Captain Maranti's team includes Bajj Maranti herself (ACROBATIC SIDESTEP, WEAPON MASTER, AMBIDEXTROUS, LEADERSHIO, VETERAN, DANGER SENSE, twin vibroblades and a pistol), Fiorella Abbatelli (REACTIVE, STEALTHY, TOUGH, VETERAN, SMG), Yarubi el Santin (AMBIDEXTROUS, MARKSMAN, FAST DRAW, STEALTH, twin autopistols) and some local hired muscle (BIG and TOUGH with an assault rifle). Maranti herself carries her usual preferred weapons, paired vibroblades. All are wearing light combat armour apart from EL Santin, who wears a stealth suit. Total 208 XP.
 |
Yarubi and Fiorella infiltrate past the shrine.
|
Maranti's team splits in two. Fiorella and Yarubi move in from the North East.
 |
Bajj and the local muscle move in through the ruined house.
|
Maranti and the Ogroid trooper use the bombed out ruin as cover.
 |
One wolf is loading a grav sled nearby.
|
Closest to the farmouse, one of the wolves is shifting some of the crates onto a grav sled in preparation for loading into the transport.
 |
Another prepares the transporter while 2 lurk outside the main building.
|
The transport is being readied for takeoff, another wolf running the pre-flight checks. The remaining 2 wolves are outside the main building.
 |
Bajj moves forward.
|
Maranti sprints lightly through the ruins to the window so she can check out the enemy location. The Ogre ducks under the entrance lintel and lumbers along behind her.
 |
The nearest Wolf smells something is amiss...
|
Abbatelli fails her activation and the nearest wolf uses the reaction to investigate.
 |
The local muscle opens fire.
|
The ogre stomps over to the wall and fires his assault rifle point-blank at the wolf, severely injuring its right arm. The wolf's heavy blaster clatters to the floor.
 |
The Wolf reacts...
|
The Ogre fails his next activation and the wolf makes an excellent triple reaction roll. Revenge time?
 |
... by slashing at the ogre's head with his claws!
|
Rather than pick up his dropped heavy blaster, the injured wolf lunges, burying the claws from his left hand in the ogre's head. The ogre drops like a sack of potatoes.
 |
El Santin deals with the Wolf.
|
Yarubi El Santin trots closer and fires both autopistols, spraying the wolf with bullets. Blood spatters the wall as the wolf is taken permanently out of the fight.
 |
Fiorella moves up.
|
Their cover blown by the bursts of gunfire, time is now of the essence. Abbatelli creeps through the bushes by the shrine, then, seeing the way is clear, dashes across the open space to the cover of the main building.
 |
Bajj stabilises the casualty.
|
Maranti jogs back to the ogre. Although he's only the hired help on this operation, she bandages his head and manages to stem the bleeding. It's too dangerous to try and evacuate him now, they need to deal with the wolves first.
 |
Wolf boss moves towards the shooting.
|
The wolf boss seizes the initiative and moves to the cover of some crates.
 |
Another Wolf moves into cover in the centre.
|
The other nearby wolf moves into the centre, ducking in behind some of the stolen supplies.
 |
Bajj trots back to the doorway of he house.
|
Bajj reacts to a wolf's failed activation. First aid completed, she returns to the doorway and prepares to move out of the ruined house.
 |
The battle so far
|
Maranti's team regain the initiative. Time to try and take control of some more objectives.
 |
Fiorella and Yarubi prepare to move in.
|
El Santin catches up with Abbatelli. He'll move through the back of the building while she probes round the front.
 |
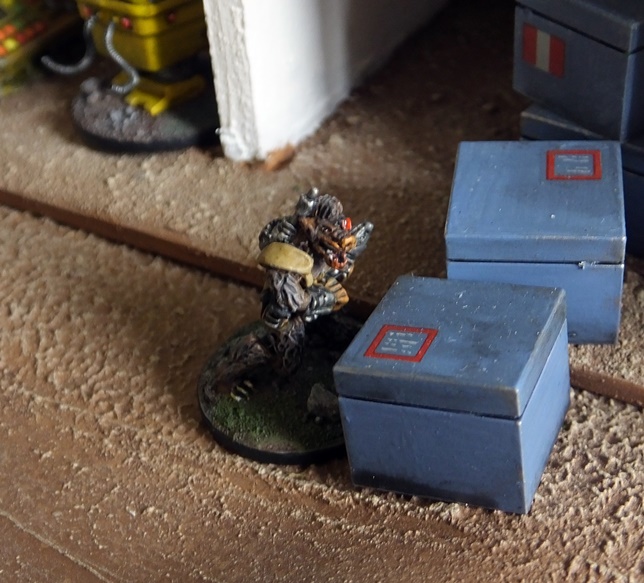
Bajj and the Wolf stalk each other.
|
Bajj runs from the ruined building into the cover of the central supply cache. She and the wolf stalk each other between the barrels and crates.
 |
Yarubi sprints through the rear compound.
|
El Santin sprints the length of the rear compound. He wants to try and get round behind the wolves.
 |
Fiorella leap-frogs forward.
|
Simultaneously, Abbatelli ducks round the end of the building and into cover closer to the wolves.
 |
Bajj make a really bad roll.
|
Maranti prepares her vibroblades... and completely fails her activation. But bad luck works both ways... and the wolf fails both reactions too.
 |
The Wolf fails its reaction - and Bajj's next roll is better.
|
Maranti tries again... she vaults over the crates, a vibroblade in each hand. The wolf stands little chance against her onslaught!
 |
Vibroblades up! Wolf down!
|
Vibroblades flicker and blood sprays across the nearby barrels. With the wolf disposed of, Maranti orders the others to move in.
 |
Yarubi stealthily creeps into the enemy rear.
|
El Santin creeps in through the rear of the main building.Taking advantage of the cover offered by an inactive droid, he stealthily moves towards the boss wolf. The wolf might have noticed him except that its nerve has failed and it drops its SMG to the ground and considers surrender! (Really bad morale roll following Maranti taking the other wolf out of action).
 |
Only 2 wolves vs 3 of Bajj's crew.
|
With Maranti's crew closing in on the wolf leader from 3 separate directions, it looks like the day will be theirs... but things can change quickly.
 |
The Wolf boss closes on Fiorella.
|
Having recovered both his nerve and his SMG, the wolf boss reacts to a failed activation from Maranti's team. He slips round round the crates towards Abbatelli.
 |
The Wolf by the transport ship dashes to join the action.
|
The wolf who was running pre-flight checks on the aircraft finally gets moving towards the sound of fighting.
 |
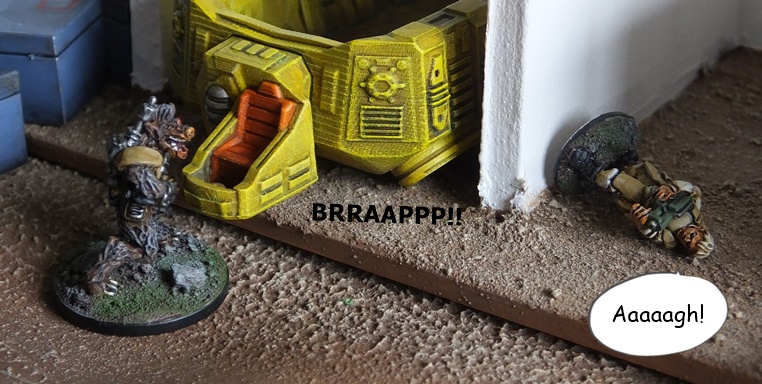
Fiorella takes a burst from the Wolf Boss SMG.
|
With his head back in the game, the wolf boss guns down Abbatelli at close range when she fails another activation. She slumps to the ground, blood oozing through her armour from a bad torso wound.
 |
Counters go on the character sheet, not the board.
|
Remember, the counters go on the character sheets, not the board! At this point in the game, Abbatelli has a couple of points of stress (-2 to activation/reaction rolls), lots of pins (penalties on morale & shooting) plus 1 wound (-1 to future injury rolls).
 |
Another Wolf leaps over the cargo to get Bajj in sight.
|
Spotting his pack-mate apparently lifeless on the ground, the wolf from the far side of the game area springs over the intervening crates to close with his target.
 |
Bajj stumbles...
|
Maranti prepares to attack the rapidly closing wolf but trips over the wolf body at her feet, staggering into the open. It's a clear shot for the approaching wolf! (Natural 1 means the enemy gets a stress-free reaction or +2 to their reaction roll)
 |
But the Wolf fails to react.
|
Luckily for Maranti, the wolf gets its heavy blaster tangled in its harness and fails to get a shot off. (Not a natural 1 but 3 is still an abysmally poor roll!)
 |
Bajj fails to activate again and this time the Wolf gets lucky.
|
Still recovering from her stumble, Maranti loses focus for a critical couple of seconds, giving the wolf time to free its blaster and blow a fist-sized hole in her torso armour. Knocking barrels and railings over, Maranti crashes to the ground. She's badly hurt, but still conscious.
 |
Fiorella manages to level her SMG on the Wolf boss and guns him down.
|
Though down, Abbatelli is not out. Her hands slippery with blood and her vision starting to tunnel, she nevertheless manages to bring the barrel of her SMG up and empty the magazine at the wolf boss as it looms over her. The first burst goes wide but the second riddles the lycanthrope and it folds into a heap on the ground.
 |
Yarubi breaks cover and downs the last Wolf.
|
El Santin bursts out from his hiding place, dashing a few paces clear of the building to get a clear shot at the remaining wolf. Levelling both autopistols he takes it down cleanly. Silence falls across the battlefield. Then Maranti's voice calls out "Well don't just stand there, find some bandages!"
 |
Last man standing!
|
With the wolves all out of action, Maranti's crew have won the day. The local population are safe from the wolves and the stolen goods have been recovered. Though badly injured, Maranti and Abbatelli are both still conscious. That's going to be 3 pieces of terrain controlled (2 XP each) plus 1 XP per enemy taken out of action (all 4 wolves) for a total of 10 XP to spend on upgrades before their next mission.
Controlling both sides in the game, it got really confusing at times, trying to keep track of all the modifiers during the game! Stress, wounds and pins were easy to remember because they were noted with counters on the character sheets. I also managed to remember to add the modifiers for marksmen when shooting and for tough characters when working out damage because they were pretty obvious thinsg to check. It was more difficult to remember who was veteran (+1 to act/react) or a difficult target (-skill level on ranged attacks against them). I also wasn't quite sure what should happen to the wolf leader. Critically failing his morale after the second wolf was taken out meant that he surrendered, dropping all weapons. Had an enemy been within 4" he'd have been captured. Because no-one came that close for some time, I decided that if he passed another morale test, he'd recover his nerve and pick his weapon up again, but maybe he should have just stayed put waiting to be captured?
Scenery scratch built from foamcore (buildings), MDF fences, crates and cargo a mixture of Lego bricks and 3d printed (including the portaloo!). Vehicles are an old Imai Thunderbird 2 plus some 3d printed grav vehicles. The big yellow robot is a Star Wars gonk power droid repaint.
Stay tuned for the next exciting adventure* of Bajj Maranti!
*The author accepts no liability if the next adventure actually turns out to be terribly dull and boring. And who knows when it'll be? Could be months...