Sunday 20 February 2022

Grav sled

 Like the grav truck, this Sci-Fi Cargo Sled was also designed by Curufin.

Handy for transporting a few crates.


I reduced it to 50% original size to make it suitable for 15mm.  I love the fact that I no longer have to think "that's great but I wish they made it in a smaller scale", if I find something I like I can just resize it and most of the time they work just fine.

Grav transport is useful where there are no roads...

 This printed well as a single piece without requiring any supports.  I mounted it on a coin to give the "hovering" grav effect just off the ground and used a couple of bits of guitar string for the control handles.

The cargo bed is a bit battered.

I used a utilitarian grey colour scheme with plenty of weathering using burnt umber/burnt sienna on the rusty areas and some silver along exposed edges.  I'm assuming those are brake lights on the back.

Also handy for transporting barrels.

The layer lines are fairly visible close to but viewed from more than about 6 inches away and they tend to disappear.  This will mainly appear in the role of background scenery anyway, so a perfect finish isn't absolutely necessary.

Ready for the next load.

It's good to have a civilian grav vehicle, most other vehicles I have are wheeled so this one will add that little extra sci-fi element.

Thursday 17 February 2022

Grav truck

This "sci-fi cargo truck" was designed by Curufin, who has an excellent range of models available on Thingiverse.  The original model was designed for 28-32mm but I planned to use it for 15mm.  I reduced it to 56% original size and printed it as several parts: hull; 2 x thrusters; cockpit; thruster straps.

Grav truck.
 Rather than use the included base, I made my own and drilled a hole into the hull to mount it on a bit of brass rod.

The vehicle was assembled with superglue gel and primed with cheap white spray primer.

An old pot of GW sunburst yellow was used for the base coat.  A sepia ink wash was used for shading, then a white drybrush.  A yellow ink wash unified the colour scheme.

A few accents were added with GW chainmail plus various colours for the lights and seat. Lots of dirt and metal steaks were added in the cargo area to simulate wear.


The control handle was made from a bit of brass wound guitar string with the windings partly stripped off. A control handle was provided, but reduced in size I thought it might be too brittle. This is a great model that suits any sci-fi game!

Saturday 12 February 2022

Barrels from Lego

Following on from my crates, I had often looked at small Lego wheels and thought they'd make nice barrels for 15mm.  Their ribbed appearance reminds me of intermediate bulk containers, something any self-respecting starport or industrial site needs.  They're also a good size, enough to provide complete cover for a 15mm figure standing behind them.

Liquid bulk storage containers.

I chose orange for a couple of reasons: first of all they were cheap (about 1.6 pence each); secondly, I didn't even need to paint a base coat - it was easy to just apply a black ink wash and call them done.  I bought some matching orange single stud circular plates and sanded off the Lego logo to fill the holes in the top.  The 6 pictured are only a small proportion of the number I ordered.  Now I have all the portable liquid bulk storage capacity my starport needs for under £1 and with minimal painting time - super cheap and super fast!

Thursday 10 February 2022

Crates from Lego

Lego is a great source of bits that you can use for scenery, even the more basic bricks. I had a few pale pink 4-stud square bricks in a batch of secondhand Lego.  These don't really go with any of our other bricks so I liberated them and provided a new lease of life as scenery for my games.

A small stack of crates.

The bricks had a flat tile glued on top as a lid and were undercoated with Wilko grey primer spray.  A quick coat of old GW blue grey paint was followed by application of a few waterslide transfers from my decal supply, a mix of tank markings from various WWII kits. Broken wiggly lines of white were painted on some to give an appearance of labels.

Paint chipping around edges.
 

They were shaded with a wash of black ink thinned with matt varnish - experience has led me to do this after applying the decals because using a decal fixing medium often reactivates the wash and removes some of it, leaving odd pale patches. Some of my ancient pot of GW chainmail was dabbed around the edges for paint chipping effect.

Lego!

So there we go, a set of crates for only a few pence.  The groove around the edge of the tiles enhances the lid effect and they're ideal blocking scenery for 15mm games.  They'd do as smaller crates for 28mm games too.

Monday 7 February 2022

WeaselTech - Hero & Swarm Mecha

Rampage Squadron's heroes will be piloting some of my old BattleMechs, excavated from the darkest recesses of the loft.  The Commando will be a rocket armed X-1 mecha, with an RPG-5 and an MRL-4.  The Commando will also carry a comms package.

Commando

Two Stingers will be beam and machine gun armed X-1 mecha.  Each will be equipped with an MG-5 and either a PL-a beam or a PL-b beam.  Stingers will carry Scanning pods.


Stingers


Stingers

Two Wasps will be X-1 mecha armed with a beam the same as the Stingers, plus an RPG-5 or an MRL-4.  Wasps will also be equipped with ECM suites.

Wasps

The BattleMechs are suitably large and intimidating compared to the weaker enemy swarms that they will be facing.


Size comparison

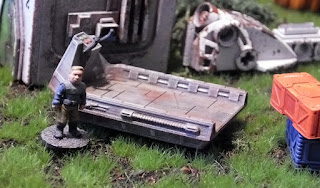
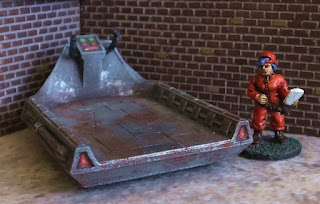
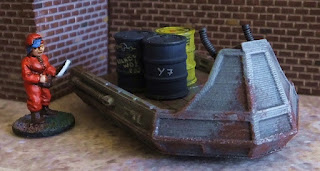
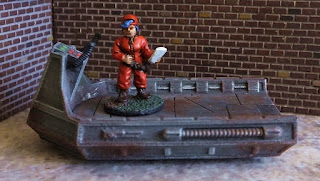
I have also printed a few small vehicles to use as either additional scatter scenery (with no actual game effects) or potential objective markers.


Swarm attack!

So far I have 15 enemy mecha painted.  All have a basic grey colour scheme with accent colours designating different types.  The base colour is a medium grey, a black ink wash for shading, a repeat of the medium grey drybrush and a final light grey drybrush.  Panel and accent detail was added as a base colour.  Rather than drybrushing (which would show up the print lines), I hand painted the highlights, adding small amounts of white each time.  Green accents are swarms, red and blue are elite units. As I print additional types, more colours will be added to the elite units.


Enemy swarms and elites.

Elite units include a Lupus OmniMech printed at 55% original size.

Lupus OmniMech

The Lupus will be a rocket armed elite unit.

Lupus rear view

Another elite is the Thanatos, also printed at 55% original size.


Thanatos

The Thanatos will be a beam or machine gun armed elite.


Thanatos

The print lines are more obvious on the grey areas wher I drybrushed rather than hand painting the highlights, but viewing at a tabletop distance they tend to disappear


Thanatos

My rocket swarm Mecha is the Yeoman, renowned for being little more than a pair of massive box launchers on legs.

Yeoman

One rocket mecha on its own isn't really a "swarm", but I have more on the way, and it has a few friends below...

Yeoman

Archers have been printed at only 45% of their original size.

Archers
 The Archers will be machine gun armed mecha.

Archers

My Jenner IIC 'Mechs are additional rocket mecha to accompany the Yeoman.

Jenners
 

Being smaller light 'mechs, they've been printed at 60% original size to keep them in line with the others.  I preferred the more dynamic pose of the Clan IIC over the original Inner Sphere design.

Jenners

The bull of my beam or machine gun swarm mecha will comprise these Wespengift mecha. 

Wespengift
 

These are not actual BattleTech models, but their non-humanoid appearance means they look like the ideal foot soldier swarm mecha for our heroes to gun down in droves. Hopefully.

Wespengift

The Wespengifts will be beam or machine gun armed as the situation requires, they should be fine in either role - as long as I remember which I've chosen!

Wespengift swarm.

I have another 25 miniature mecha to paint plus some normal sized Locusts that can act as recon mecha for heroes. I also need to check through my various saved files to see if I have any suitable enemy defences I can print out.

At some point, I hope I might actually get to play my first game too - children and work permitting!