Sunday 30 December 2012

Zombie Reinforcements 5

 My latest batch are now undercoated.  I've used black this time though I often use grey too - depends what the local pound shop has in stock!


 I put a strip of double-sided tape along a scrap of wood and stick all the bases in a line.


 This makes it easy to undercoat them all with just a few quick squirts from the spray can and I can hold the wood in the air or at an angle to get into all the nooks and crannies under the chins and arms of the figures.


Saturday 29 December 2012

Zombie reinforcements 4

The next stage with my zombies is to texture the bases.  I paint the bases with thinned down PVA and add a range of different sized bits of grit and sand.

Zombies
Rather than buying overpriced GW "modelling sand" for £4 or £5 for a 220ml tub, I buy a 25kg bag of sharp sand from HomeBase or Wickes for the same price or less.  Passing it through a couple of sieves and a tea-strainer gives me a range of different sized grits that I save in margarine tubs.  The finest grade is also good for mixing with paint to give a nice textured finish.

Werewolves and SAS

Now that the bases are textured, the next stage will be to undercoat them all.  I'll stick them all to a couple of wooden batons using double sided tape so that I can spray them all in one go.


Earthforce Marines

 I'm using white undercoat for my 15mm.co.uk automata.  Because my current spray can is black I've just brush painted these ones with Vallejo white primer, then used GW red gore and Vallejo bonewhite with a Vallejo sepia ink wash.


Automata / Skeletrons
Their colour scheme is based on the Action Force Skeletron.  I thought that it would make a change from the more traditional metal-coloured terminator style appearance.  If you look closely I haven't painted the feet yet - I still need to drybrush the bases but I'm on holiday and don't have all my paints with me!

Thursday 27 December 2012

Zombie Reinforcements 3

 Now the first batch are glued to their bases I've added some epoxy putty to fill in the gaps and blend the figure bases into the washers.

Zombie horde
 The zombie horde is coming along nicely.

Skelebots
 Lots more skelebots to come - this will be the first of 7 units.

SAS troops
 The last of my SAS troops to add the the 9 I've already finished (as seen in action earlier this month).

Earthforce Marines
 Another 13 Earthforce Marines still to finish.  Although they're nice figures, it's a shame that all 5 poses are very similar walking/standing, none actually firing.

Werewolves
 I realised that I haven't shown the werewolves yet - also from Rebel Minis.  I've been working on these at the same time.

Special Forces trooper
An extra figure from "The Scene" - a special forces trooper.

Paul's tip for the day - my usual working surface is an A4 cutting board inside a punched pocket.  It provides a shiny surface which cleans very easily - using washers as bases, the epoxy resin often oozes through the hole onto the working surface but it easily peels/pops off once it has set.  The putty also comes off easily as does paint.  When it finally gets too scuffed you can just chuck it away and slip the cutting board into a new one.

Wednesday 26 December 2012

Zombie reinforcements 2

 Glued to their bases and ready for the next stage...

Zombies on their bases.

Automata infantry.
 
Earthforce Marines.


Zombie reinforcements

 As those who have viewed my zombie games may have spotted, I haven't actually got very many zombies based and painted yet, hence the need for GZG unarmed civilians to stand in during most games.  14 zombies doesn't really constitute a "horde" I feel (perhaps more of a "hordelet"?), so I thought I'd better get a move on and finish some of my other undead!

Zombies ready for basing on washers (plus some skeletal robots!)

I have quite a number of Rebel Minis zombies from their "Modern Zombies 1" and "Modern Zombies 2" sets (which I received as part of the "Better Dead than Zed" starter box).  These are a great mix of modern zombies ranging from office workers to fast food outlet employees to firemen to policemen plus a range of assorted kids and other civilians.  I've also got a box of 15mm.co.uk fantasy zombies who will look fine painted in modern colours.

More zombies and robots need their bases filed...
All the figures get their bases filed down so they're quite thin.  Once that's done the zombies are mounted either individually on washers or in pairs on 1p pieces or trios on 2p pieces.  The multiple groupings will make it easier and faster to move large hordes.  I've got enough extra zombies ready to bring the horde up to 37, with another 20 or so cleaned up and ready to have their bases filed.

The existing zombie "hordelet".
I've got a few other figures ready for basing too, 15mm.co.uk skeletal robots and some Rebel Minis Earthforce Marines.  I ran out of my preferred washer type and have only just managed to find another supplier.  I use stainless steel M6 washers which are about the same size as the cast-on GZG bases.  I prefer small bases rather than the larger plastic bases that some people use, but that's just my personal taste.  It does mean that there isn't as much space for details like grassy tufts but it does mean that walkways and bridges etc. can be a more realistic width but still provide enough space for figures to stand.  I can store them more easily too!  I might get around to fitting some boxes with magnetic sheeting too, in which case I can transport them more easily.

Monday 17 December 2012

Aircraft for 15mm games

 My 15mm armies will soon have some much-needed air support courtesy of Matchbox Skybusters.  First up we have a flight of 3 "Stealth Launch" fighters.  These will provide ideal fast air support and will also be able to guard against enemy aircraft.  I'd see them as air superiority fighters with a limited ground attack capability depending upon ordnance loading.  They seem to be a cross between a Grumman X-29 and the F-302 from Stargate.  A very nice sci-fi fighter, perhaps slightly small for 15mm scale but I'm very happy with them.  I've noticed them cropping up in a few other 15mm blogs too, so others obviously agree.

"Stealth Launch" jets
 I also have some lower tech prop planes.  These remind me of the Skyhawks from the Amtrak Wars books by Patrick Tilley, also the Boomerang spotter 'pane from BattleTech.  These will become spotter aircraft, slow flying but highly manoeuverable.  I'd envisage these being cheap and easy to maintain, the low technology base enabling them to keep running when the grid is being jammed.  They'd also be ideal for third world countries to add a couple of hard points enabling them to carry a pair of light machine guns or a couple of small bombs.  The pusher-propellor and twin-boom tail mean that even though it is low-tech, it still looks suitably futuristic.
"Sea Arrow" aircraft
At the time of writing, painting is already underway.  I feel an airfield attack coming, perhaps something along the lines of the Pebble Island raid...

Thursday 13 December 2012

Commonwealth special forces in action

The Guavan Defence Force has been developing its own armoured fighting suit technology by retro-engineering some of the wreckage from their earlier battle with Neo Colonial Commonwealth forces on Libellula.  The work is taking place in a isolated research facility...

The battlefield
GDF technicians have almost completed their work.

GDF techs at work.
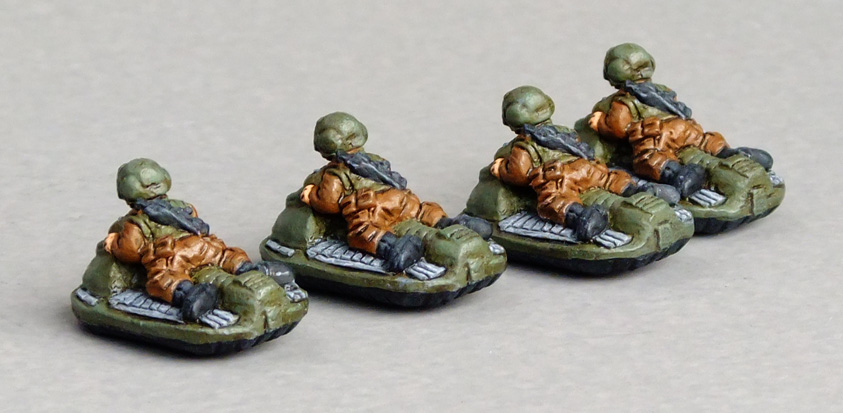
The Commonwealth forces include two teams of specialist infiltrators armed with a mixture of assault rifles, SMGs and pistols, all equipped with suppressors.  They all wear active camouflage sneak suits.  The squad leader will accompany Team 1, he is also armed with an SMG.  Supporting them is the remaining Cyclops armoured fighting suit, this time with its stealth systems fully operational!  The troopers are all Troop Quality D10, Morale D10.  Due to their mixed weaponry they will roll a strange assortment of dice.
Team 1 shooting: 1D10 (assault rifle), 1D8 (pistol), 6D6 (3 SMGs).
Team 1 close assault: 9D10.
Team 2 shooting: 1D10 (assault rifle), 1D8 (pistol), 4D6 (2 SMGs).
Team 2 close assault: 7D10
These all assume firing at optimum range (+1D) with the bonus cancelled out by the suppressed weapons (-1D).
[Note - I realised afterwards that I got this wrong, should have been a single D6 per person for SMGs over optimum range, SMGs within optimum range should have rolled 2D10!)

Commonwealth raiding party ready for action.
The teams move in from the East, filtering through the woods and carefully avoiding the GDF wheeled gun drones that are on a perimeter patrol circuit.

Commonwealth special forces sneak through the woods.
Once in position, Team 2 pass their morale test and sprint down the hill towards the GDF fireteam on guard, engaging them in close combat.

They take the guards by surprise!
Unable to return fire because of the surprise generated by the sneak suits and completely outmatched, the guards are quickly overcome.

The sentries have been silenced.
Team 2 move swiftly round the side of the building and attempt to open the hatch.

Team 2 prepare to make their entry.
Passing their TQ test they get the hatch open and move inside.

Team 2 move inside.
Team 1 move up and as Team 2 crack the second hatch, they dash inside to attack the GDF techs.

Attack!  Team 1 move through into the garage.
The GDF techs decide that their reaction to this charge will be to run for it - they're not paid to take on special forces!  The sprint as fast as their little legs will carry them, out of the building and down the track.  Seeing the commotion, the GDF infantry fighting vehicles start to move towards the building.  Squads of troops follow suit.

The techs run for it but the IFV moves in.
Alone in the workshop, Team 1 set charges on the crate of components, the captures fighting suit and the handily parked GDF scout car.

Team 1 set the demolition charges.
Team 2 provide covering fire to keep the escape route clear.  They take down one of the GDF troopers whilst avoiding taking any casualties themselves.  The GDF squad miss the next turn while they administer first aid to their severely wounded comrade.

GDF troops take casualties from Team 2's covering fire.
The GDF wheeled drones cease their patrolling and move towards the disturbance.  Having evaded detection thanks to its stealth equipment and adaptive camouflage, the Cyclops catches a drone by surprise.

Cyclops Fighting Suit prepares to fire on a GDF gun drone.
It successfully destroys the drone, but an IFV and a squad of troops round the corner of the building.  The Cyclops succumbs to a lucky shot from the IFV's light autocannon, the shells finding a weak spot in the armour and rupturing the fuel cells.  The pilot is killed instantly as the Cyclops erupts in flames.

GDF troops spot the Cyclops.
Team 1 emerge from the building and leap straight into combat with a squad of GDF troops. 

Team 1 locked in combat with GDF troops.
They wipe out the opposition and Team 2 do likewise with a second GDF gun drone.  There is nothing they can do for the Cyclops pilot but he has covered their escape.

Having defeated the immediate threats the Commonwealth forces prepare to escape.
Having dispatched the nearest opposition, both assault teams make a rapid getaway over the hill and into the woods there their sneak suits will hide them from pursuit.  Behind them the charges detonate, destroying the captured Cyclops and crate of recovered technology.  Despite the loss of another Cyclops (too badly damaged for the GDF to recover anything this time), the mission is a success for the Commonwealth!  The GDF meanwhile have 4 dead, 4 seriously wounded and a few other light injuries.

Team 1 make their escape.
A quick, fun game to play, a chance to try out some special forces with a range of different weapons in Tomorrow's War.

The cast:
Commonwealth special forces: Rebel Minis SAS
Guavan Defence Force: GZG OUDF troopers
Guavan techs: GZG gun crew in berets
Cyclops suits: GZG
GDF vehicles: DLD Productions "Kamodo" AFVs and Matchbox "Stoat" scout car

Monday 26 November 2012

Games Mat - update

 I've finished the first few stages on my games mat.  I've also produced a small test square (20x20cm or 8x8 inches) to experiment with a few techniques.  One of the first things I've done is try setting objects into the sealant so see what sort of texture they leave when I remove them after the sealant has dried.

Back of a tie pin / pin badge - should look like a man-hole cover!
I textured the rest of the surface with a sponge and dragged my large aluminium ruler across one side to produce a roadway.

Plastic cross-stitch mesh.
 After 24 hours I carefully removed the items.  The mesh left a nice texture behind.  The pin back pulled the sealant off with it, so I'll class that one as a failure!  I tried again but it pulled the sealant off again, I think it has too much texture in comparison to the base fabric.  The mesh is good because it's quite a chunky, very smooth polythene plastic so the sealant doesn't stick to it.

The dried test piece (the crinkling flattens out without any real difficulty).
I painted using Wilkinson's tester pots.  Java Bean is a good dark brown base colour, Nutmeg Spice a lighter colour that gives a mottled appearance when sponged on while the  base is still wet.  Flintstone for the concrete hard standing.  The road is black acrylic which dried to an odd, slightly shiny texture which attracts dust, fluff and stray hairs exceedingly well!

Base coat.
One dried I gave a drybrush of coffee brown and urban jungle green.  The river was painted using inscribe acrylics.  It didn't come out quite right, but this was a test anyway so I'm not too worried.

Almost finished...
 I'm quite pleased how some of the experiment have turned out.  The road works well, though the ruler is only wide enough for a single vehicle width.  I'll need a thicker plasticard template to use if I make a large games mat featuring roads.  I already knew the tyre tracks worked.  The mesh surface gives a slightly off texture but I quite like it, rather like widely spaced concrete sets.  It will certainly do to add interest if I make an urban games mat.


The entrance to an IMEC mining site.
 Ensuring an even thickness of sealant is clearly important when using the mesh!  Only a very thin layer is required - too thick and it comes up through the holes.

Hard standing

Tyre tracks through the mud.

Tarmac road and man-hole.

The standard sponged texture.
 I've completed the texturing on the entire 6 x 4 foot mat and have also given it a coat of Java Bean so my next task it to start highlighting and mottling the surface with other colours.

Thursday 15 November 2012

SG15-HS3 - Hammer's Slammers infantry on skimmers

 My mounted Slammers have been painted in the same colour scheme as the dismounted infantry, as described in my earlier posts.


You get 4 identical skimmers in this pack.  If you wanted to add a buzzbomb launcher it wouldn't be too hard to fabricate one from a bit of brass rod/tube or even a plastic sprue offcut.


I've painted their skimmers Humbrol 86 Olive Drab the same as their body armour, with a Valejo sepia ink wash.  Details are picked out in Vallejo stonewall grey with a black wash.  The GEV skirt is Vallejo matt black with a Humbrol 32 dark grey drybrush.


I've already got some which act as fast scouts for my NAC troops, though I've treated them as grav vehicles rather than GEVs.


They're also ripe for conversion by adding bits of brass rod, plasticard fins and head-swaps.