Late last year, I received a playtest copy of the second Five Parsecs from Home expansion. This includes rules for salvage missions that looked like they'd provide an excellent "Space Hulk" type experience*.
*Yes, I still judge sci-fi dungeon-crawlers by comparison to Space Hulk, the same as I judge all fantasy dungeon-crawlers against HeroQuest - I had the first editions of both games, Space Hulk in 1989 when launched, and HeroQuest that I obtained for the grand sum of £5 in 1994 at a GW mega-sale. I also acquired a remaindered stock copy of 2nd edition Space Hulk for £5 in The Works. But I digress, back to 5PH...
Rather than risk my existing crew, I rolled up a new crew to try out the salvage mission:
On the back row, we have L-R:
Precursor armed with a colony rifle and a screen generator. Feldena Melisse is hacker from a subjugated colony, known to be very loyal to her companions.
Human with an infantry laser, handgun, fake ID and a scanner bot. Aaron Close is a drifter.
Human with a colony rifle and a blade. Ben Headland is a bureaucratic starship crewer on the look out for romance.
Front row, L-R:
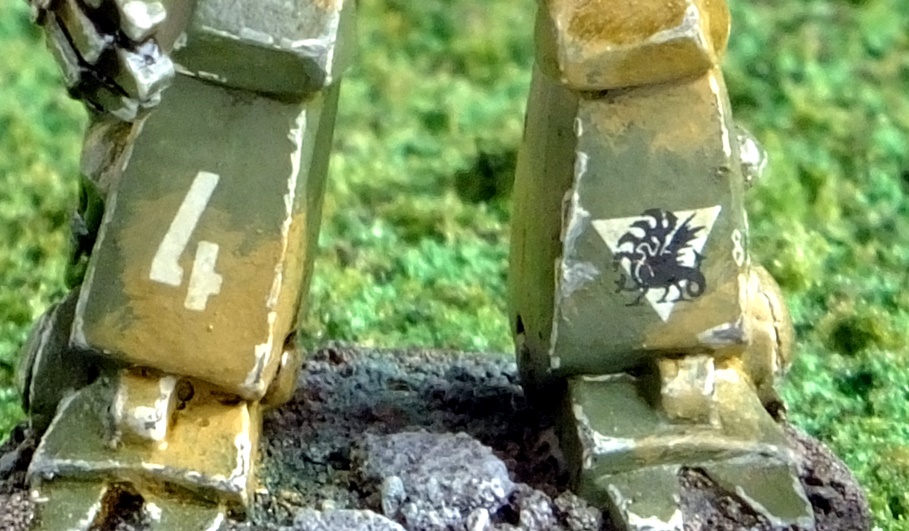
Feral with an infantry laser, scrap pistol, tracker site and a nerve adjuster. Fadron Ty Koom is a former ganger from a research station. He wants fame.
Skulker with an infantry laser and glare sword. Skreek is a former enforcer, eager to obtain technology to compensate for his upbringing on a primitive world. (Apologies for the unpainted figure!)
The crew captain, a Manipulator with a hand laser and a scrap pistol. Chutaan Slaa is a fame-seeking alien bureaucrat who is also something of an artist. (Rad zombie standing in because I didn't have any other appropriate figure.)
The crew first met on their previous job and have decided to strike out together on their own. These lovable rogues live on board the unreliable merchant cruiser Hopeful Venture. Operating on a minor polity world, a secretive organisation is offering danger pay (+2 credits) but a better bet appears to be the wealthy individual with higher danger pay. The crew decide to undertake a salvage mission instead, mainly because that's the thing I most want to try from the new rules! A small facility located within an asteroid near the edge of the system has gone dark, the Hopeful Venture needs to dock and investigate, retrieving data from the computers and exploring the complex. The facility has been tunneled out following veins of ore and as a result, the tunnels twist and turn in a confusing maze...
This game also presented an opportunity to dig out my old caverns, one of the very first bits of scenery to appear on this blog and something I haven't had a chance to use anywhere near as much as I intended. 4 points of interest (red counters, marked in numbered green circles) are located in the middle of each quarter of the board, the crew need to investigate these.
 |
The complex, with points of interest marked.
|
The crew muster in a small storage area (within 2" of a random board edge) just off the main docking bay. From here they will split into 2 teams to explore the asteroid and try to reach the 4 "points of interest" marked. Team 1 will move out towards point 3, via point 1. Team 2 will head for point 2, then either loop up to point 4, or withdraw back to the docking bay if team 1 can get the objective completed more quickly.
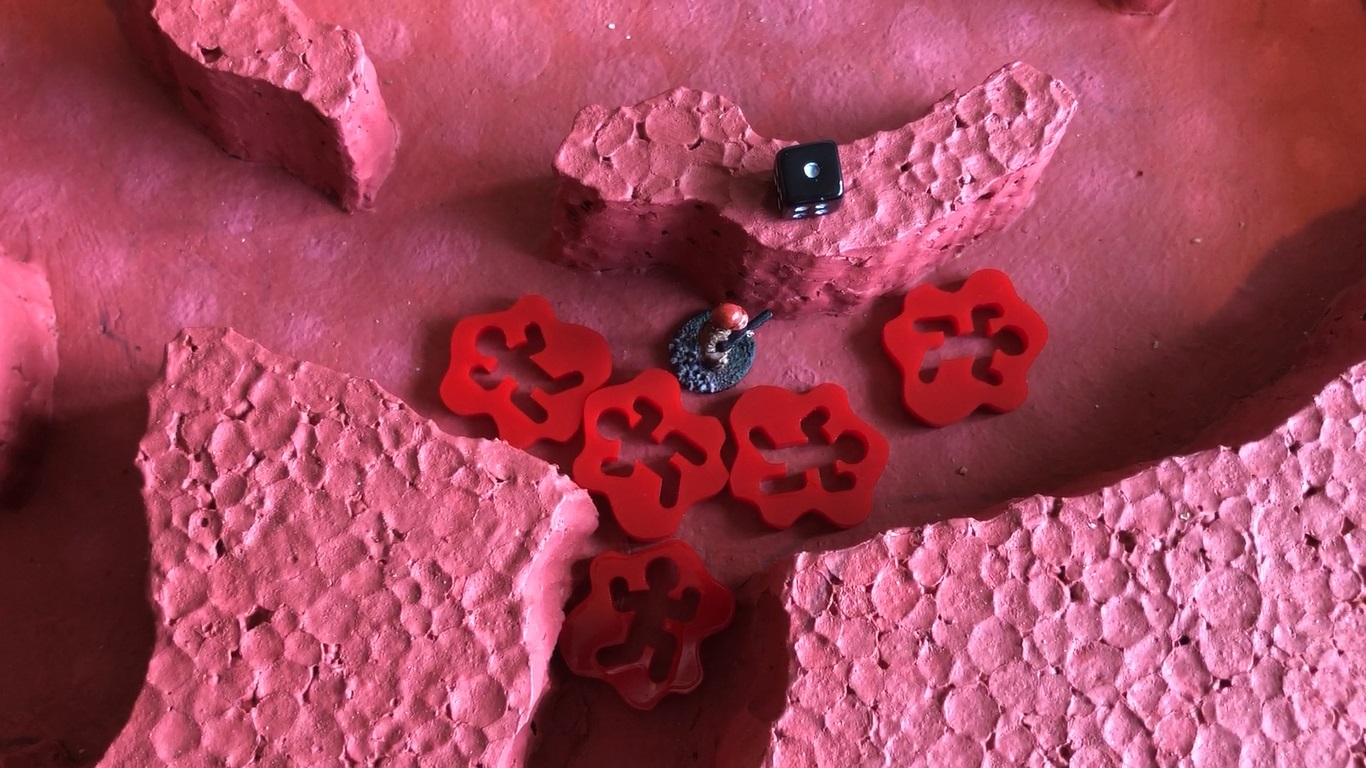
Throughout the facility are scattered 8 red pawns which represent "scout markers", 2 in each quarter of the board. What will they reveal? Only time will tell...
 |
Storage room point of interest and salvage marker.
|
Also present are 2 (D3+1) salvage markers in the form of large metal suitcase-type containers located near points 3 & 4.
 |
A scout marker lurks near this point of interest and salvage marker.
|
Team 2 start out. The Feral leads the way, the Manipulator following as fast as his pseuodopods can propel him.
 |
Group 2 proceeds
|
Team 1 prepare to move out of the storage room. There's nothing of interest in these first 2 containers.
 |
Group 1 heads for the main storage room.
|
Team 2 roll for the nearest scout marker which turns out to be a scanner contact. Because the roll was a 6, the next closest scout marker is also converted into a contact (now marked by skulls).
 |
Team 2 detect
|
Team 1 move rapidly through to the first point of interest, which turns out to be a secure computer console (D100 roll of 52) that they will need to access to retrieve data. The closest scout marker turned out to be nothing, but the next closest moves 6" towards the team. Fortunately it's separated from them by the rocky tunnel walls, though there's a danger it could come round behind them...
 |
Group 2 locate their first point of interest.
|
|
While the skulker attempts to access the console, the remaining members of team 1 move on towards the next point of interest.
 |
The skulker checks the console while the rest of the team move on.
|
Team 2 discover that the closest contact was a false reading on their scanner, so they, too, can close on their first objective.
 |
Team 2 press on though the narrow corridor...
|
Turn 3: Team 2 move to the cavern conaining the point of interest which also turns out to be a computer console. The nearby contact marker is revealed to be 2 Converted Infiltrators (Converted = think the Borg from Star Trek) who are placed 8" towards the bottom of the board.
 |
Converted infiltrators.
|
They were obviously hiding in a small storage room off the main chamber and are armed with military rifles. An additional scanner contact appears in the centre of the board, plus 2 more 12" from it. Rolling for the location of these places one up a corridor ahead of team 2 on the left side of the board, the other close to point of interest 3 on the right side of the board.
 |
Infiltrators lurk round the corner.
|
Not having any particularly cyborg-styled figures to hand, I'm using some Armies Army SKOV militia/insurgent forces. The range was sold a few years back and is now available from The Scene instead.
 |
SKOV militia/insurgents in the centre.
|
These are a near-future Russian insurgent styled range of figures, equipped with AK-47 type assault rifles, RPGs and similar.
 |
A few more SKOV in the centre.
|
Wearing balaclavas, they are suitable mysterious and are obviously well-equipped, being laden down with ammo and equipment pouches. They are ideal for an undercover alien force infiltrating the facility.
 |
Close up detail of SKOV.
|
The Precursor leads Team 1 into the main cavern and rolling a 6 means the closest scout marker became a contact, as does the next closest.
 |
More contacts towards the rear of the main cavern.
|
The closest contact turns out to be another 2 infiltrators with military rifles.
 |
Enemy sighted!
|
A quick overview of the situation reveals that both teams still have some way to go to reach the salvage markers and all the points of interest.
 |
The crew marked in green.
|
The 2 human crew members trot forwards to reinforce the Precusror.
 |
Prepare for combat!
|
The infiltrators rush forwards into hand-to-hand combat.
 |
Infiltrators grapple with the crew.
|
The Precursor deftly fends of the first infiltrator's attach and kills it with a well placed blow that penetrates the armour. Close by, her human crew-mate grapples with the other infiltrator and both combatants become stunned from the fighting.
 |
One down...
|
On the other side of the board, the 2 infiltrators dash out from the storage chamber into the cover of some barrels and open fire.
 |
Infiltators emerge.
|
The Feral is uninjured but the hail of bullets fells the Manipulator captain!
 |
Down goes the Manipulator!
|
The Feral takes a shot with his infantry laser but misses the infiltrators. He moves into the cover of some barrels.
 |
Take cover!
|
The infiltrators follow up their initial success by charging into close combat with the Feral. Will he succumb or is this his chance for revenge?
 |
Time for revenge?
|
At the entrance to the main cavern, the second human leaps to the aid of his colleague but immediately falls to a fierce blow from the infiltrator! The
Skulker has retrieved the data from the first console and leaping over the fallen human, activates his
glare sword, swinging at the infiltrator and stunning it.
 |
Can the second human help?
|
The infiltrator recovers himself and deftly eliminates the second human.
 |
No, he's down too.
|
The Feral proved a fearsome opponent. Thanks to his scrap pistol and combat prowess, he swiftly defeats both infiltrators and avenges his fallen captain.
 |
The Feral proves his worth in close combat.
|
The bloodbath at the entrance to the main chamber continues. The Skulker slashes through the infiltrator with his glare sword - but in the same moment, the infiltrator's blow fells the Skulker! Only the Precursor remains standing in a corridor awash with blood.
 |
Last one standing.
|
The Precursor moves rapidly around the corner into the main chamber.
 |
Point of interest reached.
|
The point of interest is yet another computer console and the Precursor quickly sets to work trying to extract the data.
 |
The precursor attempts to access the computer console.
|
The Feral lopes over the infiltrator corpses and inspects his target computer console.
 |
| The Feral attempts to access another console. |
He succesfully accesses the system and extracts the data.
 |
Data is extracted.
|
On the other side of the complex, the data has been collected so the Precursor picks up the nearby salvage marker. This will be examined after the game.
 |
What's in this case?
|
Further into the complex are a salvage marker (silver suitcase) and another point of interest (red counter). The Feral is going to head for these next.
 |
Point of interest (centre) and salvage (left).
|
Having collected the salvage, the Precursor dashes back towards the cavern exit. Just in time, too - the pair of contact markers in the furthest corridor turn out to be 4 more infiltrators.
 |
More infiltrators sighted!
|
The Feral also spots more infiltrators just beyond the next salvage marker. He ducks into the cover of a curve in the rocky passage.
 |
Infiltrators ahead!
|
It's too risky to run for the salvage or the point of interest. Have to shoot it out.
 |
Too dangerous to move forwards.
|
Shots are exchanged and the farthest infiltrator slumps against the wall.
 |
| Scratch one infiltrator. |
Things aren't going well back in the main cavern. Before the Precursor can make good her escape, the infiltrators rush forward and a burst of gunfire cuts her down.
 |
Precursor slumps to the ground.
|
The sound of heavy gunfire echoes through the corridors to the Feral's location. Another scout marker appears behind the surviving infiltrator here. The Feral fires again, and his infantry laser claims another victim. Unimpeded by enemies, he dahses forward to cature the salvage marker. The nearby point of interest is revealed to be.. a "discovery".
Mission complete, the Feral extracts back to the docking bay.
Was the mission a success? The data was retrieved, as was some of the salvage - but 5 of the 6 crew have been left unconscious or dead on an converted infiltrator infested asteroid. It wasn't completely clear from the playtest rules what would happen to the them. The Feral won't be too keen on heading back in there to try and retrieve them.
The Manipulator captain suffered a minor injury with no long term effects; the human a serious injury; the other human a minor injury; the Skulker a crippling injury; the Precursor an equipment loss. Possibly the Feral needs to rename their vessel the Hopeless Venture...


