I drew a quick
sketch of a revised layout based on the polystyrene I'd glued down so
far. This incorporates some of the changes and a few other ideas. I'd originally planned to create a road across the board, probably using white acrylic caulk with black cement dye mixed in for a nice grey colour. The board will be more flexible if I create a dirt track instead.
 |
| Sketch map of the board. |
With the underlying structure complete, it was on to casting some rock moulds. As with my previous rocky tree hills, I decided to use some aluminium foil to make the moulds. I tried to make fairly large, thin expanses of rock that would be easy to break into smaller sections for use. Number 1 son helped with the crumpling and shaping of the foil.
 |
| Foil rock mould. |
The plaster was poured, Crystacal R which sets fast and hard and gives lovely crisp detail. While I had some mixed up, I poured a couple of Linka brick moulds too. I discovered that a light spray with isopropyl alcohol beforehand really helps draw the plaster into all the recesses of the mould and reduces air bubbles.
 |
| Position of steps. |
With the plaster set, I peeled off the foil and started cracking sections off to test where they are required. The layout has evolved slightly, now there will be a ledge running around the back of the main outcrop, with an overhang above. Number 1 son helpfully gathered some stair blocks from my Hirst Arts bits box and positioned them for me. These are only temporary, the actual stairs will be carved from XPS and more in keeping with 15mm than the 28mm Hirst Arts ones. Gluing of the rocks is done when the children are safely out of the way in bed!
 |
| Ruins and bridge. |
I have a big box of pre-cast Hirst Arts blocks so Number 1 son and I spent a while playing with different configurations for the building on the top.
 |
| Bridge and steps. |
I dug out some suitable blocks for the bridge between the plateau and the smaller outcrop. A nice Roman arch is more interesting than a wooden bridge. I also cut some steps into the polystyrene at the side to provide access from the ledge to the rear.
 |
| Second rock cast de-moulded. |
I needed another sheet of rock, so more foil was procured from the kitchen cupboard. I was a bit more careful with this casting. The previous one had featured some very deep folds and the foil had torn in several places when being removed, small scraps remaining trapped inside some of the rocks. This time it was more successful, the foil still tore in a few places but none got trapped.
 |
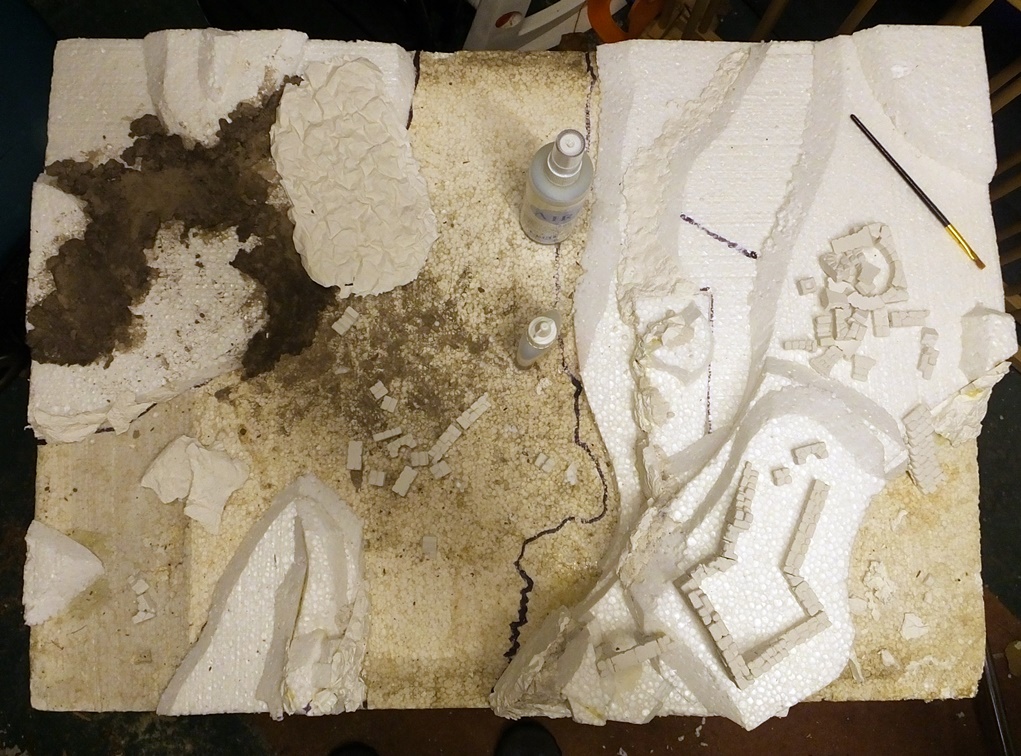
| Modelling compound / sculptamold. |
I also experimented with some "modelling compound" or "sculptamold" type ground cover. A loo roll was cut off the cardboard tube and dropped into a bowl of water. After a few minutes soaking, the pulp was pureed with a hand blender. Mixed 50/50 with plaster of Paris, it was applied to various places. Crystacal-R sets very quickly so my wife picked up a bag of cheap casting plaster from the local DIY shop. This actually proved to be incredibly slow-setting and I also used a bit too much paper in the mix. The combined result was that it took about 3 days to full set so I decided that very small batches using Crystacal-R would be the better way to go. I also experimented with using some mortar tone (cement dye) with the mix, a bit of brown plus a small amount of black to give a nice dark earth colour. I thought that this might provide a good base on which to add my ground cover but it dried quite a bit paler than it first appeared so I decided not to use it again on this project.
 |
| Rock moulds in place. |
With children out of the way in the evenings, rocks were glued in place with Gorilla glue. The expanding gap-filling qualities of this glue are especially useful when gluing uneven rocks to uneven polystyrene.
 |
| Main rock face with cave below. |
A small cave was added to the front of the main outcrop as well. Some 15mm scale 3d printed doors will be used to show the access points to the underground base.
 |
| Rocks around ledges. |
The thin sheets of plaster crack easily into suitable sections for gluing around the polystyrene. Gaps will be hidden by dribbling plaster in or using the modelling compound/sculptamold proxy.
 |
| More rocks ready to fit. |
Things had come together nicely andn with the majority of the rocks in place, the next task would be to finish off the basic landforms to get everything ready for painting...
 |
| Work in progress... |


Beautiful work, very inspiring!
ReplyDelete