When I made my tree hills, one of the main reasons I wanted to do it was to try out couple of new techniques, creating rocks using aluminium foil and painting using the leopard spot technique. I first read about the aluminium foil method in a book on model railways that I had as a child but never had the opportunity to try it back then. Having seen people using Woodland Scenics rock moulds on various YouTube videos, I thought I'd try the foil trick to see how it compared.
 |
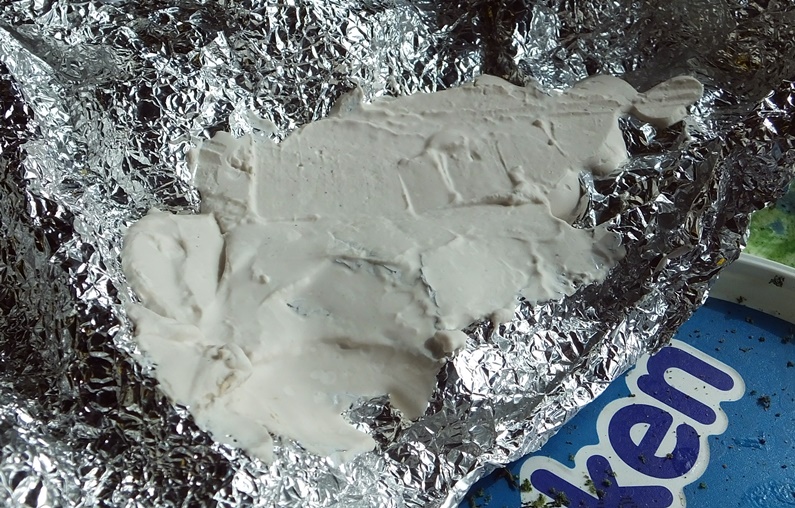
| Materials: foil & plaster. |
|
|
|
|
The foil was crumpled and creased, then shaped into troughs and hollows to contain the plaster. The plaster was mixed in the usual ratios to a creamy mixture and poured into the moulds. I left if fairly shallow because I didn't want the weight of the plaster to deform the thin foil moulds spill out! If I do it again, I will set the foil moulds into a bed of sand to better support them.
 |
Moulds setting.
|
 |
Moulds setting.
|
Once the plaster had set, the foil was carefully peeled off to reveal the rocks. Because they were cast fairly thin, it's easy to snap them to the size that you need.
 |
Demoulded rocks ready to use.
|
 |
Detail of plaster rock.
|
 |
Lots of rocks.
|
Once embedded in the hills and set in place with sculptamould, the rocks were painted using the "leopard spot" technique.
 |
Colours to use (apart from the green).
|
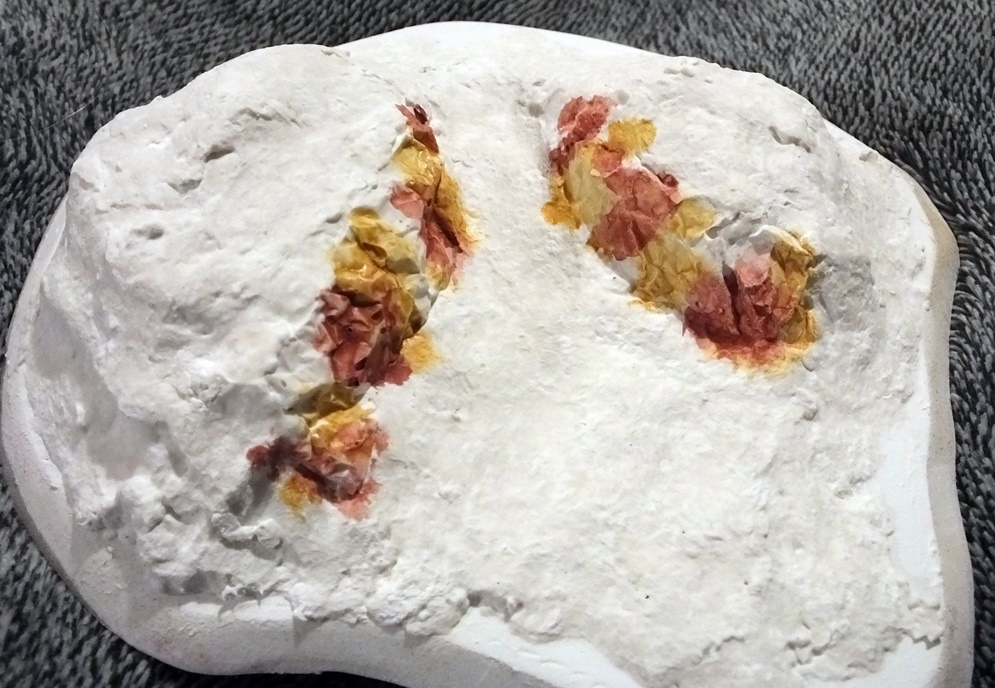
Burnt sienna
and caramel were watered down and dabbed on in spots, each covering about
1/3 of the rock area. 1/3 of the rock area was left plain white.
 |
Burnt sienna and caramel paint applied.
|
 |
| Burnt sienna and caramel paint applied. |
Next, a mix of very thinned burnt umber paint was washed over the rocks. This blends the other 2 colours together and also tints the remaining white areas of plaster.
 |
Burnt umber wash applied.
|
 |
| Burnt umber wash applied. |
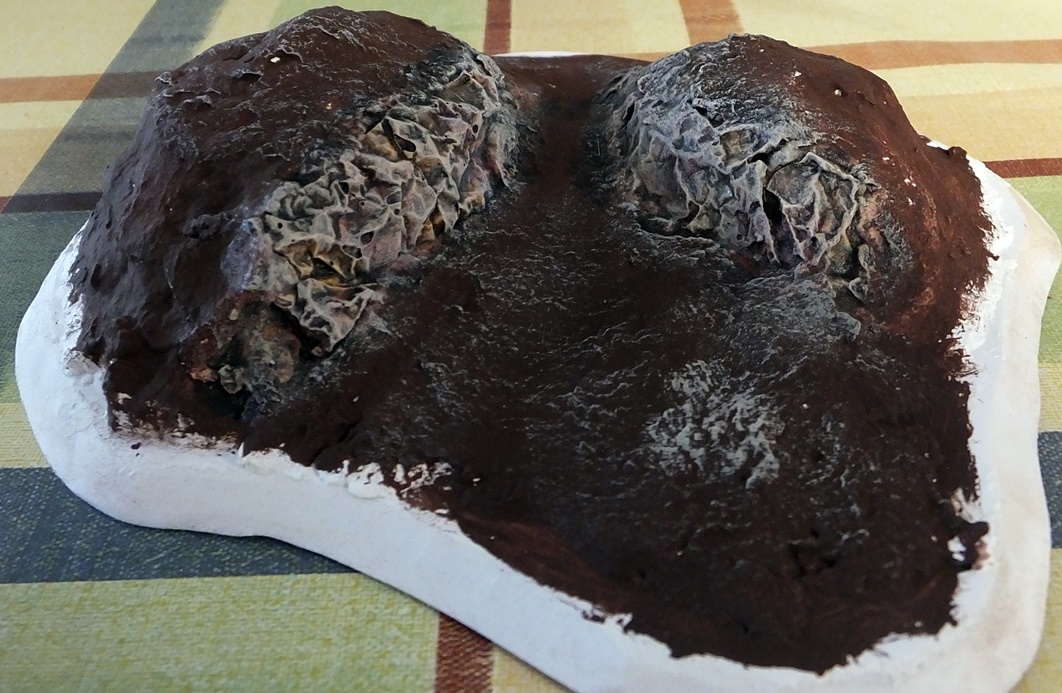
Next was a shading wash of very dilute black paint. This really brings out the texture of the rocks. Apologies for a few duplicate pictures from the previous post in here!
 |
Black wash applied.
|
 |
| Black wash applied. |
 |
| Black wash applied. |
 |
| Black wash applied. |
 |
| Black wash applied. |
 |
| Black wash applied. |
The final step was to drybrush the rocks with taupe to create a dusty highlight. I think I slightly overdid this stage, so the yellow and red colours are hardly visible.
 |
Taupe drybrushed as a final highlight.
|
 |
| Taupe drybrushed as a final highlight. |
 |
| Taupe drybrushed as a final highlight. |
Although the rocks were finished, there was still flocking required to finish off the rocks. The last few pictures are detail shots of the rocks in situ with all the flocking, scatter and trees in place. They actually look better now than in the previous stage, possibly because I took advantage of the sunny weather to photograph them in daylight rather than in the poor artificial light of our dining room.
 |
Finished rocks.
|
 |
| Finished rocks. |
 |
| Finished rocks. |
 |
| Finished rocks. |
 |
| Finished rocks. |
 |
| Finished rocks. |
I count these experiments as a qualified success. What did I learn?
- I should have used new foil. I was recycling an old bit of foil that has been re-used several times in the kitchen, which meant that it had been folded and re-folded multiple times. Using fresh foil would probably have made the texture of the rocks clearer and sharper.
- Don't drybrush too much for the final stage! I almost spoiled the entire thing, luckily it's just about OK. I could always apply another wash of black, but the red and yellow tones have disappeared a little too much.
- This was an easy way of creating lots of different rocks without buying rock moulds or searching for rocks to make my own rubber moulds. I could even try making foil moulds of some real rocks if I do come across any that I like. The leopard spotting technique gives more interesting rocks than a plain grey drybrush and it works just as well on plaster as over white paint.
- Real leopards aren't actually white with red and yellow spots. Well, to be honest I did already know that but it's still an easy way to describe the technique!


No comments:
Post a Comment