Wednesday, 22 March 2023

Spring of Scenery 2023 - Part 2 : Improving Chinese Trees

~~~~~~

I have some bags of model trees,
I think them rather fine.
In origin they were Chinese;
But now they are all mine.

 ~~~~~~

My Chinese trees came in 4 sizes:
40 x 1:150 scale 8cm £4.99
50 x Z T Scale 3cm £3.99
50 x 4cm 1/300 £3.55
30 x OO/HO scale topiary £3.73
Plus
10 x palm trees OO/HO or 1:100 scale £3.23 (as seen in my recent "Palm Tree Improvements" post)
 

My large palm trees (plus smaller cake decorations)

I had lots of flock ready to use, I also whipped up a few bushes from Reindeer lichen sponged with brown paint, painted with PVA and sprinkled with fine foam flock.  These can look a bit odd on their own but work well on a base mixed with other scenic elements and textures.

 
My cheap Chinese trees were all very uniform and neat, suitable for ornamental planting but not for my intended use.  I re-flocked them by dabbing a rough coat of PVA over the surface, then sprinkling on a range of foam flocks.  I used a variety of colours and sizes of flock to avoid the trees looking too uniform.  Some had their trunks painted in different greys and browns to give even more variation.
 

A spray of water and isopropanol ensured that a quick follow-up spray of PVA would be drawn into the flock to bind everything together and hopefully avoid too much shedding during games.

Tuesday, 14 March 2023

Spring of Scenery 2023 - Part 1 : Forest test base preparations

My forests currently consist mainly of small coniferous trees mounted individually on coins.  I do have a box of Woodland Scenics tree armatures and several tubs of flock/clump foliage ready for making some more detailed trees.  Although the results are very good, the disadvantage is that it's quite time-consuming to make them.
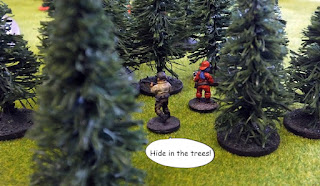
My existing coniferous trees.

 A trawl of e-bay provided me with 180 trees for under £20, postage free from China.  170 are a mixture of 4 different styles and colours of deciduous tree.  The remaining 10 were palm trees to bulk out the smaller ones I made from cake decorations for my desert gaming mat.

Now that I have lots more trees, I need to think about how to use them all.  Time to experiment with some woodland!

Although it's nice to have individually based trees, it will be more practical to make patches of woodland with several trees on each.  I want larger forest areas that I can easily drop on the table in one go.  This will also give me the opportunity to add more in the way of ground cover such as bushes and other undergrowth, fallen trees, pools/streams, piles of cut logs and small buildings or sections of ruins.  It will also be easier to define what counts as forest for line-of-sight and movement purposes if there is a base which clearly delineates the edge of the terrain feature. Fiddling around making a mound of putty to help secure each tree trunk used to take ages and with a patch of woodland it will be quicker and easier to build up the base and drill holes into which I can glue the tree trunks.
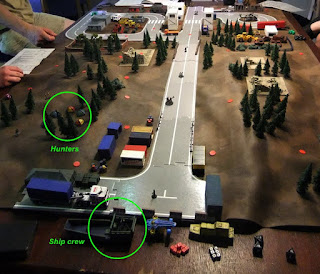
All those trees take a while to set up!

The occasional Woodland Scenic tree can be added as a focal point as desired, and I will leave some open areas or removable sections to enable me to swap out special features.  My forests will be used for both 15mm and 6mm gaming, so buildings in particular are likely to be made modular so that I can use the appropriate scale for the game I'm playing.  I'm thinking of using the same size hole saw for all, making the special features 100% interchangeable between the woods.

My woodland base is made from 5mm Foamex.  As mentioned previously, this is an expanded PVC, mainly used for sign writing, display mounting etc.  It's easy to cut, very light, pretty rigid in this thickness, and it's waterproof, so won't warp the way plywood, MDF or foamcore can when you use a thick layer of paint or PVA.  It's also something you can often get free if you ask a local signwriter or exhibition display company if they have any offcuts.  Pieces that are too small to be any use to them can still provide bases for several buildings or other pieces of scenery.  One drawback is that because it's waterproof and non-porous, it isn't easy to stick.  PVA doesn't adhere and superglue can peel off, but something thicker like no-nails, UHU or Gorilla glue works very well.

For this test piece, I made one large base, then a smaller section to add on the top.  It was coated in brown acrylic caulk, which seems to stick fairly well and provides a good key for the next stage which was painting with various browns and greens.  Holes were drilled to insert the trees.

Test fitting the trees.

Coming back to this a few weeks later, I wasn't really happy with the look, so I re-painted it with textured paint (sand, ready-mixed filler, PVA, burnt umber acrylic).  This gave a much better result.

Textured paint.

Wilko Nutmeg spice and coffee emulsion tester pots were used to paint over the textured paint.

Base colours applied.

A drybrush of desert sand helped blend the different base layers together and completed the first stage.

Drybrushing complete.

Stage 2 will involve some improvements to the Chinese trees...


Saturday, 4 March 2023

Sci-Fi Walls

These 28mm Z.O.D. Sci-Fantasy Walls by Dutchmogul were scaled down to around 56% original size for printing as 15mm scenery.  They're designed to print upright (Z.O.D. = "Z-Axis Optimised Dominion") and I managed to squeeze this entire set onto a single build plate.  Given how small the Photon Zero build plate is, I was very impressed with this result!  I positioned them all diagonally on the build plate to try and reduce the vertical pixel lines which has worked reasonably well.

Look out!

They interlock using tabs and slots.  There are three main wall panel designs, a gateway and a number of connectors to allow angled or dividing walls.  Because these are resin printed, I had to do some sanding to remove the "elephant's foot" around the base that closed up the bottom of the slots.

A build plate's worth of walls.

I printed 3 of each of the main wall panels to give me plenty of variety when putting together a structure.

Wall A.

The panels were base coated burnt umber, then some patches of burnt sienna were dabbed on.

Wall A reverse.

The whole of each panel was drybrushed silver, then given a coat of Pledge/Klear floor polish to seal it for the next stage.

Wall B.

I masked various areas with toothpaste, applied using a small scrap of sponge.  I tried to vary it so that some had more than others, and concentrated on the areas where most wear would occur.

Wall B reverse.

Before the toothpaste could dry out, the panels were sprayed with cheap white primer.  Once they were touch dry, I soaked them in warm water and scrubbed with a toothbrush to reveal patches of the rusty metal effect underneath.

Wall C.

The set also includes a decorative gateway.  This includes a chunky threshold to keep the piece rigid and prevent the top from snapping.

Gateway.

A few of the walls had some extra detailing applied with very dilute sepia ink to enhance the detail.  I'm not sure about this yet, so I've only painted a few so far, including the gate.

Gateway.

The paint chipped effect has worked as planned, and these will work with either my desert buildings or with various other sets of my sci-fi scenery.

Gateway - reverse.

The connectors have been painted in the same way as the wall panels.  They include angled joints, end sections and 3-way connectors in both 90 and 120 degrees.

Spacers & cappers.

The circular objects on the panels were painted gem-style in blues, reds and greens.  The small gems came out just as I wanted.

Gem detail.

The blue didn't work quite so well, they were more awkward to paint because they were much larger, but they aren't too bad.  All the gems were given a coat of gloss medium to give them a shiny finish.

Gem detail.

Although I don't think I'd build an entire complex out of these walls, they will be ideal for enhancing some of my scratch builds.  My desert buildings are all very generic so far, but I'd like to build a few more definitely sci-fi ones.  These walls would be great for making some small compounds attached to the main buildings, or to enclose a yard between a couple of buildings.