Saturday, 4 January 2014

More Stoats - now with guns!

  I've been meaning to post these pictures for some time - my repainted Matchbox Stoat armoured cars have received gun mounts from Peter Pig.  These are designed for Hummers but fit nicely into the top of the Stoats.  A stack of 3 washers (the same ones that I use to base my figures) are glued inside the top hatch and the Peter Pig hatch gunner drops neatly into place.  Because they're glued to the old "rolamatic" rotating platform, the gun mounts are firmly attached to the vehicle but can still be rotated if desired.

Stoats on patrol.

.50 cals in the lead with a TOW bringing up the rear.

"The Scene" US special forces watch the convoy drive past.


This time I've remembered to paint the headlights!

Note ammo box added to far vehicle.

Jerry can added to rear.

TOW mounting provides extra anti-tank punch.

Gun mounts can swivel for added play value!
I think these gun mounts are great.  The detail is fantastic and they represent an extremely cheap and easy way to add interest to a vehicle.  They are also useful to help give a sense of scale to something like these Stoats which are not specifically designed as 15mm vehicles.  As a bonus, the heads of the .50 cal gunners come separately so it would be easy to use a set of GZG conversion heads or some of the many Peter pig conversion heads to create a post apocalyptic feel.  There is a socket in the neck of the figure so you don't even need to drill a hole!

Friday, 3 January 2014

More dungeon escapades

A couple more recent games of Heroquest in my Hirst Arts dungeon.  I usually manage to get an extra room or two built before each game.  This time I've added a new spiral entrance staircase tower and also the Dragon Throne - a large stone-built throne topped by a dragon skull, this gives control of the undead to whomsoever sits upon it.  I also sanded down the various doors and repainted them.  Now they actually fit inside the door frames!

First we have a recent game from the Old Buckenham Bone Crushers...

The wizard enters a room containing skeletons.

Dwarf fights a skeleton.

Evil Necromancer and undead horde pursue halfling with stolen spell book!

After him!

Halfling ascends the Dragon Throne and takes control of the undead.

Heroes charge along the corridor.

Controlled by the halfling, the undead storm in and defeat the minotaur.
Cunning use of spells enabled the heroes to snatch victory from the jaws of defeat in this game.  The wizard cast "pass though rock" onto the halfling who was able to make an incredibly lucky movement die roll and get all the way into the throne room in a single move.  Once he took control of the vast undead horde, victory seemed assured - or was it?  "Right you evil bastards," he growled at the heroes, "now we'll see who's in charge!  This'll teach you all to be nasty to me!"  The halfling gave an ominous chuckle and rubbed his hands with glee...

Fortunately for the rest of the heroes the halfling managed to get a grip on himself and was persuaded to remain their ally!

The second game was another of our regular Scout games days.  The dungeon proved so popular with the Scouts that I had to add a second level into the dungeon so that they could continue the adventure for the entire day!


Dungeon level 1 - heroes enter from spiral stair on left.

Level 2 - Bloodthirster and his retinue!

A lone dwarf takes on the Chaos Beastmen.

Dungeon Level 2

Elf takes on the Necromancer in his lair.

Lone dwarf shortly before his demise.

Bloodthirster, beastmen and Chaos warriors swarm out of their chamber.

"Byeee!"  Wizard decides that discretion is the better part of valour.
An exciting game, in the end 4 of the 5 heroes had been slain and the sole survivor (master of swords) was down to a single body point when his final blow slew the Bloodthirster.  The Bloodthirster was a fearsome beast, rolling 10 dice to attack and defend while the heroes only tended to roll a maximum of 4 dice to attack or defend.  The poor lone dwarf was sliced in half from head to groin by the Bloodthirster's mighty blow!

The master of swords drank deep from the nearby fountain of healing and felt re-energised.  Now he would drag the bodies of his comrades back to the fountain and try to heal them too.  Perhaps if he dunked the two halves of the dwarf's body into the fountain and pressed them back together that might work?

Wednesday, 1 January 2014

Necromunda game

Something a little different today. While my friend Howard was home to see his parents I was able to pop over for a couple of games.  Our second game of the evening was Necromunda, the old GW small unit skirmish game using a modified version of the 2nd edition WH40K rules.  Click on the photographs for a larger view.  I took lots, mainly to show off Howard's fantastic scenery!  Of particular note is the monument covered with tiny notices, all individually painted and glued on.

Scenery is a mixture of foamcore, GW Cities of Death bits, IMEX platformer, Hirst Arts (plaster moulded doors, lots of the crates, barrels etc.), Ramshackle Games (vehicles), Black Cat Bases (vending machines and other scatter scenery) and assorted bits of wire, old electronics parts, steel mesh, toilet ballcock and more...

Howard's army was the (better painted) Scavvies, mine were the outnumbered Cawdors.  The scenario: Scavengers (pp.154-155 of the hardback rulebook), 5 glass beads are scattered around the table representing loot that gangers can pick up...
 
Scavvies rush forward on multiple levels.

Cawdor gangers make their way up one of the towers.

Cawdor boss dashes forward to pick up the first loot.

Another Cawdor grabs the second loot.

Scavvies approach their first loot marker.

Cawdor Juve takes cover behind a vending machine.

Cawdor heavy (old Kryomek figure) and Juve with invisible pistol.

Cawdor gangers watch for the Scavvies.

Scavvies cautiously creep forwards...

Scavvy Scaly looks out over the underhive...

Scavvy spots a Cawdor in the distance!

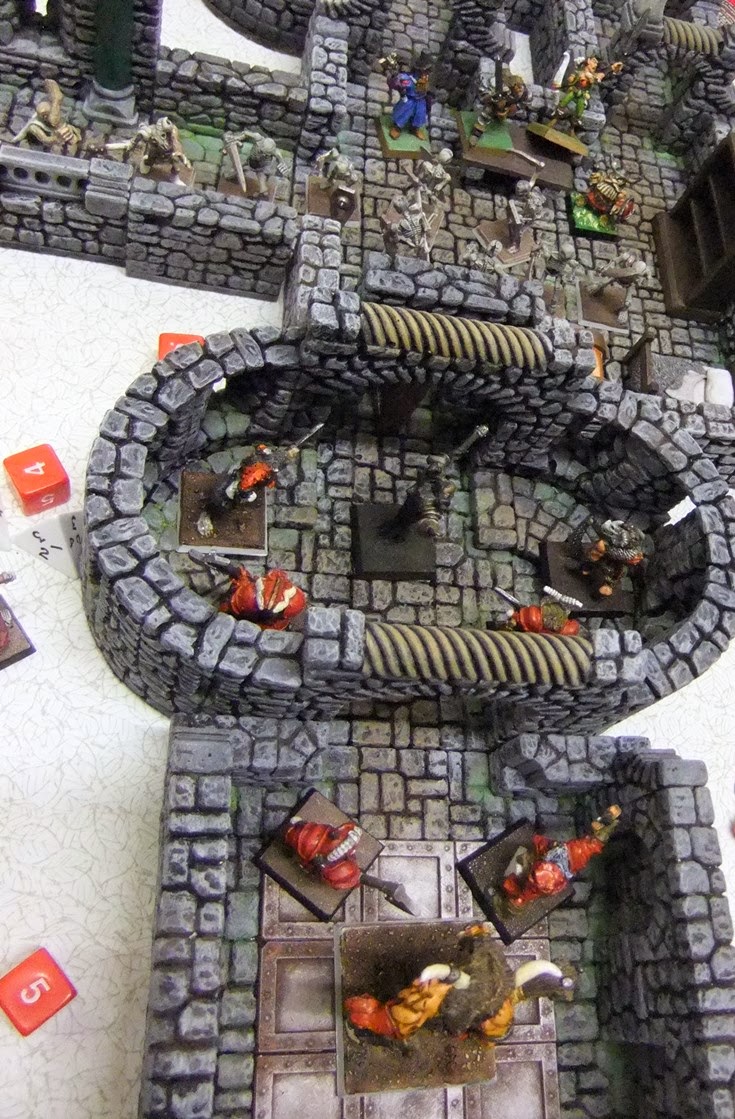
Scavvies cross the bridge towards two Cawdor gangers.

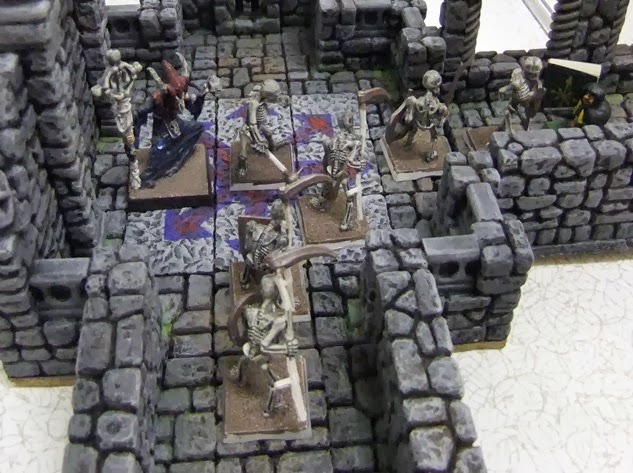
Plague zombies shamble towards a Cawdor ganger.

View across the table.

Howard's fantastic scenery and Scavvies.

Aaaaagh!  Plague zombie attack!  As the Cawdor fights for his life...

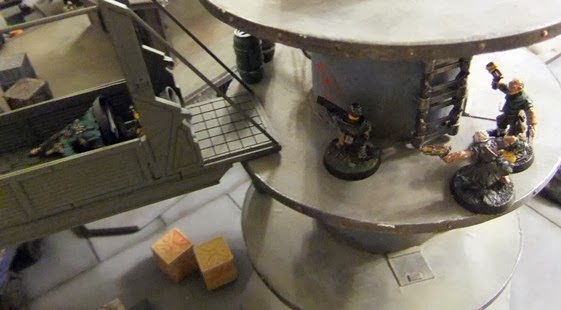
Scavvies lurk below him - and they've found a ladder!

Zombie and 2 additional Scavvies taken down - but look out!

Cawdor Juve has the loot - but Scavvies close in!

Cawdor ganger gives covering fire.

Cawdor heavy and his woefully ineffective heavy stubber.

Scary Scaly thunders across the bridge towards the Cawdors!

Scavvy boss and one of his minions are down!

There's too many of them!  Scavvies attack from all sides.

Scavvies, zombies and Scalies everywhere you look!

Down goes the Cawdor.

My Cawdor gang - boss, heavy, 4 gangers, 3 juves.

Howard's excellently painted Scavvy horde

Plague zombies on left, Scavvies on right.

Scavvy boss flanked by Scalies.

More Scavvies, inluding a 3-armed mutant.
A fun game, although the Cawdors were hugely outnumbered the majority managed to survive, mainly thanks to very flukey die rolls!  We didn't play the game to its conclusion but I had 3 of the 5 loot counters and had taken down the Scavvy boss, a zombie or two - but there were still plenty out there!