Materials:
Polaroid inkjet photo-paper from Poundland
Blank dice from Witzigs shop on Amazon (99p for 10)
A laser printer (I used a friend's)
Scissors
Iron*
Ironing board or other heat-resistant surface
Pan scourer
*Note: The iron will be HOT! Exercise caution and don't put it face-down somewhere and get distracted by your dice! The dice cool fairly quickly, I was able to handle them with bare fingers the whole time but if you aren't sure, use gloves or other protection.
1) Work out your designs. Text needs to be reversed - you can type it into a text box in word, then reverse the image. That way, once you're ironed it on, the text will be the right way round!
2) Print out designs on inkjet photo paper. Laser photo paper won't work! You need the glossy inkjet surface. Print out a test page first with a pencil mark in the top left corner so that you know which way up you need to insert the paper and can check the size of symbols against your die. Don't print too many sheets at once, I have heard that if the printer gets too hot, the coating of the paper can come off inside and gum things up.
 |
| Ready to go! |
2) Cut the symbols into sets of 6. I didn't cut them all out in one go - less chance of accidentally putting the wrong mix of symbols on!
 |
| Snip snip... |
3) Carefully position the symbol on the face of your die (ink side down) and iron with gentle pressure for 10-15 seconds. I use medium heat. Try and place the iron directly onto the die and keep it very still so you don't smear the image.
 |
| Iron for 10-15 seconds on medium heat. |
4) Reposition the die and continue ironing on the bits of paper until you've done all 6 sides.
 |
| Turn the die and add more symbols. |
5) Allow the dice to cool for a couple of minutes so the ink sets in completely. If you're doing several, the first ones should be cool by the time you've done the last one.
 |
| Leave dice to cool. |
6) Carefully peel off the paper. Your image should be visible on the die.
 |
| Remove paper. |
 |
| Nearly finished! |
 |
| Ready for cleaning. |
 |
| The removed bits of paper - still some traces of ink left. |
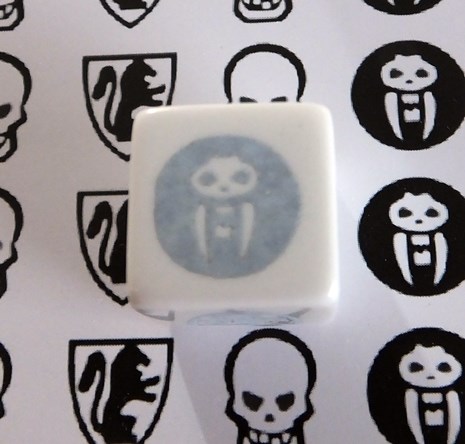
There will still be a layer of film from the paper over the images on your die, so they will look very pale.
 |
| Pale die symbols. |
 |
| Comparison between die and originals. |
7) Wet your dice and give a gentle rub with the pan scourer to remove the last traces of paper film.
 |
| Half wet, half dry! |
 |
| Start scrubbing! |
8) Your finished dice - start rolling!

I've been making dice for 2 games here. Heroquest (resized to 90% original size so they fit better than the trial die that I made in April) and Tomorrow's War / Force on Force casualty dice (the underscored ones are for trained medical aid which result in a better recovery rate). A few came out slightly wonky or off-centre but at about 11p each I can afford to make lots of spares anyway.


Very nifty indeed :)
ReplyDeleteThank you very much Paul! I have wanted to try this for a while and your photos and walkthrough make it very clear. Off to pound land tomorrow and I guess I'm going to need an iron as well :)
ReplyDeleteGood luck! I'd advise you to order at least one more bag of dice than you need for practice / spares!
DeleteGreat stuff! Cheers for the step-by-step.
ReplyDeleteHello. Thanks for posting this. So you run inkjet photo paper through a laser printer?
ReplyDeleteYes - I assume that the laser photo paper is made so that the toner binds more permanently, but the inkjet paper has a coating which keeps the laser printing on the surface. I've heard that the heat in the printer can make the coating stick to the roller which is why I suggest you leave a couple of minutes between prints.
DeleteCool. Thanks man.:-)
ReplyDelete