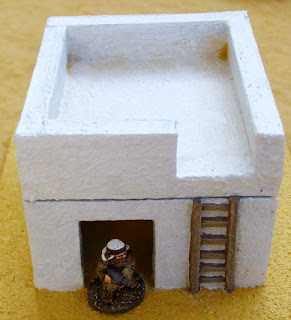
Well, after several months I've finally managed to finish off my Afghan-style desert dwellings. These will be used in modern games, they'll also appear in the more arid desert regions on the colony world of Gordon's Gamble.
I started working on this back in May 2011, but work ground to a halt just after I'd applied the initial texturing. This was mainly because I'm lazy and flit from project to project when I get to any difficult bits, in this case trying to create a dome for the mosque/meeting hall!
Here is the finished article - plastic ball former covered with cling-film received a papier-mache base layer followed by a coating of thick plaster of paris. A good firm sanding smoothed it down and it was fixed to a foamcore roof with than cardboard edges. Texturing helped bring the whole lot together and concealed any defects in the construction!
Windows are made of that mesh stuff you use for cross stitch, carefully cut to size and PVA glued in place.
The largest building, also the tallest. The little canopy at the front is glue-soaked kitchen towel and cocktail sticks.
All the roof sections lift off. In this case, the top section is completely square so that you can position it 4 different ways.
Some buildings have stairs, others have ladders. I imagine that this one has stairs inside to first floor level, then the little ladder to the roof. Ladders are chopped up matchsticks and balsa scraps.
All the buildings have received a thick coat of Dulux weathershield masonry paint which I hope will be long lasting and wear resistant. The roof areas were painted in the sand colour first, then lightly stippled with the white, leaving dusty areas in the corners.
I'm pleased with the end result. The yellow matches our gaming club's desert boards, so they'll fit in nicely.
Sunday, 22 January 2012
Subscribe to:
Post Comments (Atom)


You've done a very fine job there. Great looking scenery.
ReplyDeletegreat technique...really liked the brown on the roof bit, hadn't thought of that.
ReplyDeleteGreat job!
ReplyDeletePast the difficult bits, then on to glory! Very nice execution, and I trust your masonry paint holds out in inclement weather!
ReplyDeleteWow it looks great,how did you do the dome?
ReplyDeletePlastic ball, covered with clingfilm (so I can remove it afterwards), papier mache base layer (newspaper + PVA glue), then layer of plaster (about 3-4mm thick). After it has dried for a couple of days, sand heavily to get a fairly smooth finish, then remove ball & trim the edges so that it sits neatly on top of the roof.
Delete