Friday 13 November 2020

2020 Summer of Scenery - Part 11b: More hedges!

Well, this is my second try at writing this post - I was just about to publish it when something happened to Blogger and the whole thing irretrievably vanished! 2 hours work lost but hopefully this re-written version won't prove too disjointed and rushed...

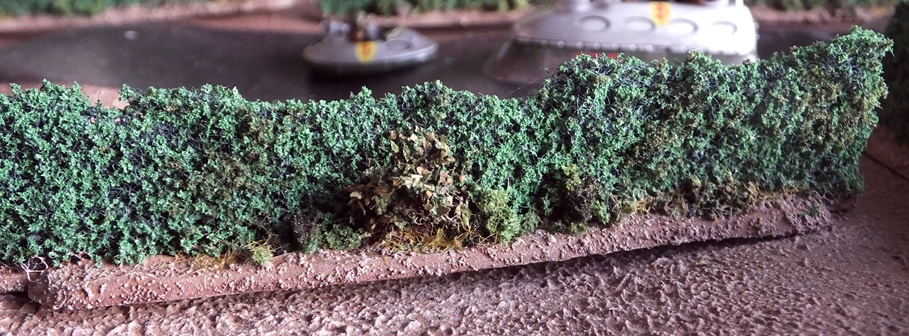
Hammer's Slammers patrol moving through the countryside.

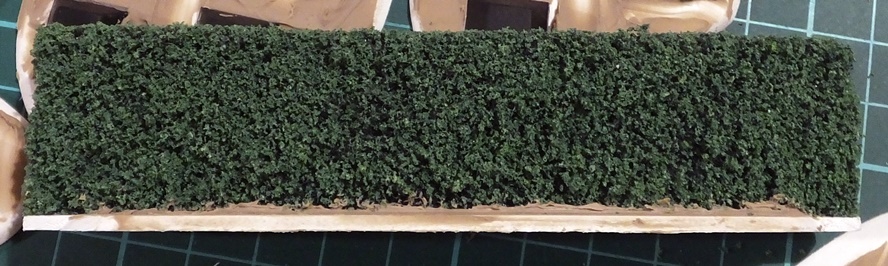
My initial batch of hedges are extremely neat but I'd like some rougher ones for more rural scenery.

 I started by cutting strips of pan scourer the same size as the original hedges.  These were then cut into a wavy shape but keepng the ends the original height.  This will ensure they all fit together neatly and will also enable me to incorporate the neat hedges should I need them.  I chopped out the top from a variety of angles so it isn't completely flat.  I also pulled tufts out from the sides so that the width is a bit more variable.

I wanted a few trees to break up the hedgeline, these are all Woodland Scenics armatures from their small-medium tree pack.

 Bases were cut from 2mm foamex and shaped at the ends so they'll fit together either straight on or at right angles.  Edges were trimmed slightly wavy and then bevelled.  Trees and hedge strips were hot glued into position and brown acrylic caulk smeared on to provide a good base for painting.

 I trimmed the hedge down either side of the trees to make it easier to attach branches and foliage.

 Reindeer lichen (Cladonia rangiferina) was glued onto the tree armatures to create the branch structure.  This is the first time I've tried this but it seems to have worked well. Patches of brambles were created with finely chopped coir/coconut fibre from hanging basket liner.

 Additional bits of clump foliage were glued onto the hedges here and there to break up the shape a bit more.

 The base received a coat of textured paint, then Nutmeg Spice and Coffee brown with a Desert Sand drybrush (all Wilko tester pots).

 The hedges were slathered in watered down PVA which I squeezed through them before I sprinkled with fine green foam turf.  A few patches were given some extra drops of glue and some darker brown-green flock was added.

 The trees were painted a variety of cheap acrylic craft colours, mainly taupe, grey and burnt umber.  Reindeer lichen was painted in the same colours but with equal amounts of PVA added.  The paint/glue mixture was applied using a sponge which allowed me to coat the lichen well but without damaging it.  The sponge also drew off the excess so that the fine detail of the structure wasn't obscured.

 After the trees had dried, the paint/glue mix had added a fair amount of rigidity to the Reindeer lichen.  PVA was dabbed over them and a range of different flocks were used: foam flock in various sizes; green-dyed tea-leaves; green-dyed finely ground garden leaves.  The real leaves seem to have worked best.

 More watered down PVA was dripped trough the trees to fix the flock firmly in place and add even more rigidity to the branch structure.

 I took a few pinches from all the different colours of foam clump foliage I've made and mixed them all together.  PVA was dabbed along the bottom of the hedges and little sprinkles of this mixed foliage attached.

 A few bits of Reindere lichen were also glued into the sides of the hedges, these were painted and flocked the same as the trees to create smaller shrubs.

 The coconut fibre brambles were coated in PVA and green dyed tea-leaves of very fine dark flock used for their leaves.

 A few patches of green tea leaves were also PVA'd along the bottom of the hedges.

 The finishing touch was a sprinkling of static grass here and there at the base of the hedge.

 These hedges have turned out pretty well, if I do some more I'll probably try to vary the width slightly more and I need to make at least a couple of sections with gates in them.

 I'm particularly pleased with the Reindere lichen, it has turned out to be surprisingly rigid once coated with paint & PVA so I'll definitely be using that more when I build trees in the future.

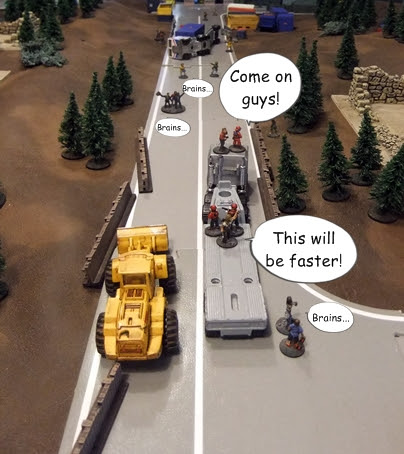
The hedges will be excellent for blocking line of sight for infantry but are still low enough for vehicles to see over.

Now I just need to fit in a game or two to make use of them!


 This is the last part of my Summer of Scenery.  Yes, I know that it's Autumn now but these projects all got started in the Summer.  Various circumstances delayed publication but I have more plans that should come to fruition over the next few weeks...

Tuesday 10 November 2020

2020 Summer of Scenery - Part 11a: Hedges!

Several years ago (was it really 2013?!) I started on some hedges and the other day I came across them in a box and decided I should probably finish them.

 Forgive the duplicate photographs fom the original posts but this was the project so far:

Hedges cut from large green pan scourers in approx 4 inch long sections.

Hedges cut in 2 different heights.

Some tall enough to block LOS and movement.

Others shorter to provide partial cover.
 
I got as far as flocking the hedges (squirted with PVA then squeezed through to coat all sides before sprinkling with fine foam turf flock), but then the project stalled as I wondered what would be the best thing to use for basing them.
 
Hedge with flock.

Tall hedge flocked.
 
MDF seemed a bit too awkward to cut to a suitable size and I was worried about warping or delamination of the edges and whether it would be so chunky that it would overwhelm the hedges. I also considered a more minimalist approach, just using a large washer 1/4 of the way from each end but I wasn't sure how to fix them securely.
 
Tall hedge.

Short hedge.

7 years of prevaricating is long enough so I've finally pulled my finger out and got on with it.  2mm foamex sheet was easy to cut in thin strips and is not so thick that it is particularly noticeable.  It won't warp when textured and painted.  I cut the strips to about 15mm so that the 5mm hedge will occupy the central 1/3.  The edges are trimmed slightly to a bevelled, wavy finish and the ends are cut down to allow hedges to fit end-on or with a right angle corner.

Hedges were hot-glued in place, then the top of the bases received a thin smear of brown acrylic sealant.  Once that had dried, brown texture paint (brown paint, ready-mixed filler, sand & PVA) was daubed all over the bases.

Hot-glued and caulked.

Caulk helps fill the join and hide hot glue.

Base showing cut down ends and wavy edges.

The usual Wilko emulsion Nutmeg Spice/Coffee was painted onto the base and drybrushed with Desert Sand so that they'll match my usual gaming mat.

Hedges complete.

Trimmed ends allow right angle corners.

Only the tall hedges done so far.

These are all very neatly trimmed.

15mm figure for scale.

These have turned out fine, so next up will be some slightly rougher countryside hedges in contrast to these neatly trimmed ones.  If I made a few more shorter sections of neat hedge too, I could make a nice maze, perhaps with a topiary sculpture in the middle...


Sunday 8 November 2020

Escape from Zombie Island 2019 - Part 2

 Previously on Escape from Zombie Island...

Our 5 groups of heroes found themselves stranded on an island surrounded by zombies.  Quickly organising themselves, the inland groups started hunting for supplies and making their way to the dock.  Those already at the dock also started hunting for supplies but disaster struck and some have already succumbed to zombie bites or been devoured by the hungry undead!

Now we return to the action, with the security team speeding towards the docks.  Hurtling towards them is an articulated lorry driven by one of the escape boat crew.  With both drivers travelling at speed and distracted by zombies clinging to their vehicles, disaster seems inevitable...

The security team ram some zombies...

...with disastrous results for the lorry!  Driver should have worn his seat-belt.

Oblivious to the chaos unfolding down the road, the hunters have found fuel for the boat.

One of the miners decides maybe he won't try for the helicopter.

Meanwhile the other two have obtained transport.

Rescue arrives for the lone miner.

His explosions having succeeded in distracting the zombies...

..one of our heroes makes a run for it.

But alas! He has miscalculated.

His last heroic effort kills a few more zombies before he succumbs.

Zombies move towards the carnage of the crash site.

The hunters manage to roll the fuel drum to the boat.

The miners trundle towards the harbour, squashing zombies as they go.

The second low-loader prepares to head to the harbour.

Weaving through the buildings, it bumps onto the road and accelerates.

Drawing alongside the digger, they prepare to barge through the zombies.

The security team move to the cover of some shipping containers.

The digger squashes another zombie.

One of the security team dashes for the safety of the boat.

The surviving ship crew-girl takes out another zombie.

Mashed zombie stuck in the digger's transmission, the miners transfer to the low-loader.

The lorry speeds down the road.

Zombies pursue them.

Getting around the crashed lorry will be tight!

As the lorry slows, zombies manage to clamber aboard.

The survivors desperately try to fight them off.

But zombie numbers inevitably take their toll.

More zombies are accumulating on the route.

Some of them rush the ship's crew-girl and the orphan.

She fights one off but the other two persist.

Still coming, the lorry veers round the crashed truck...

...and narrowly misses the other survivors!

A volley of close-range gunfire disposes of the zombies.

The crew-girl guns down her last opponent.

At last all the survivors are aboard!

The ship fuelled, they make good their escape.

For now, at least, the remaining survivors are safe...